REVIEW · AUCKLAND
Coromandel Day Tour From Auckland
Book on Viator →Operated by Auckland & Beyond Tours · Bookable on Viator
A volcano-coast day, without the stress. This Coromandel day tour strings together Driving Creek Railway and Hot Water Beach for a mix of quirky sights and real nature time. I also like that the day is built around fixed, easy-to-follow stops with real viewpoints and hands-on moments. One drawback to plan for: lunch isn’t included, so you’ll need to budget for it or bring a snack stash.
You start early—pickup is around 6:00am from Auckland city center—and the whole outing runs about 12 hours. The good news is you’re in an air-conditioned vehicle with bottled water, snacks, and onboard Wi‑Fi, and you don’t have to coordinate transport between distant sights.
One timing detail matters: the day’s start time can shift based on tide schedules at Hot Water Beach. That usually keeps your hot-pool digging window workable, but it does mean you should expect the schedule to be slightly flexible.
In This Review
- Key highlights you’ll feel right away
- The early Auckland pickup: why starting at 6am works
- Driving Creek Railway (Eyefull Tour): the quirky train that’s actually worth it
- Hot Water Beach mineral pools: the hands-on part of the Coromandel
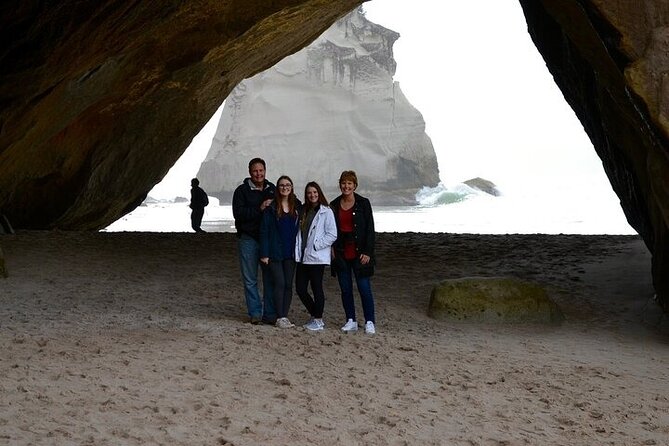
- Cathedral Cove: walking there is part of the reward
- Price and logistics: what you’re paying for (and what you still need)
- Getting the most out of a 12-hour loop
- Who this Coromandel day tour suits best
- Should you book the Coromandel Day Tour from Auckland?
- FAQ
- What time does the Coromandel day tour start?
- How long is the tour?
- Is pickup and drop-off included?
- What’s included in the price?
- Is lunch included?
- Is there a chance the tour gets canceled?
Key highlights you’ll feel right away
- Driving Creek Railway’s spiral ride to the Eyefull Tower, with tunnels, viaducts, and reversing points
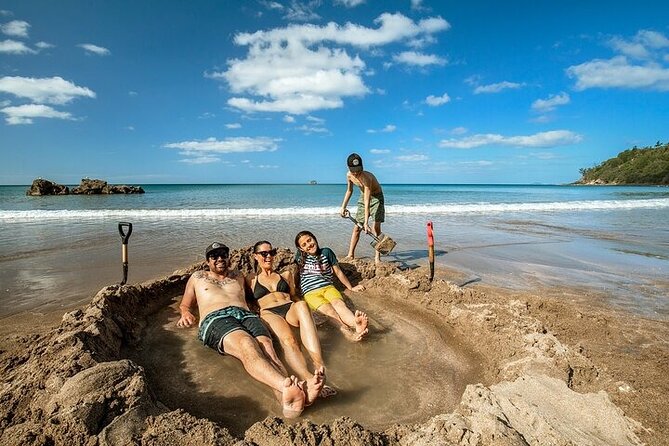
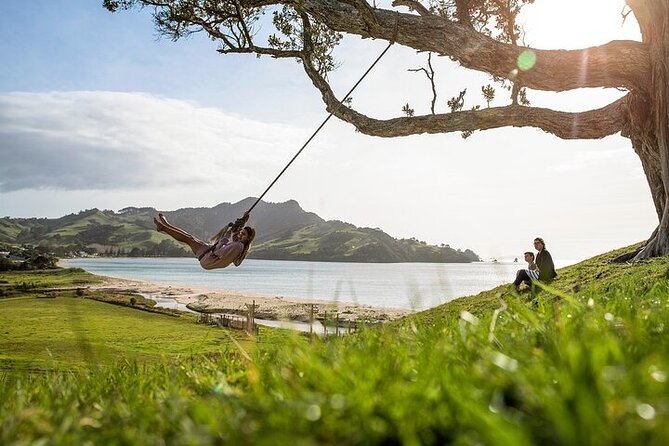
- Hot Water Beach with your own spade (provided), so you can dig mineral pools right at the shore
- Cathedral Cove via the coastal walkway, a classic Coromandel shoreline stop
- A small group size (max 19) and a professional driver/guide to keep things smooth
- Snacks, bottled water, and Wi‑Fi included so the day stays comfortable between stops
- Timing adjusted for tides, especially around Hot Water Beach
The early Auckland pickup: why starting at 6am works
If you hate guessing, this tour is built for you. You’re collected from Auckland city center in the early morning and you’re back again at the end of the day, so you avoid the usual Coromandel headache of private transport, parking, and “where are we meeting?” stress.
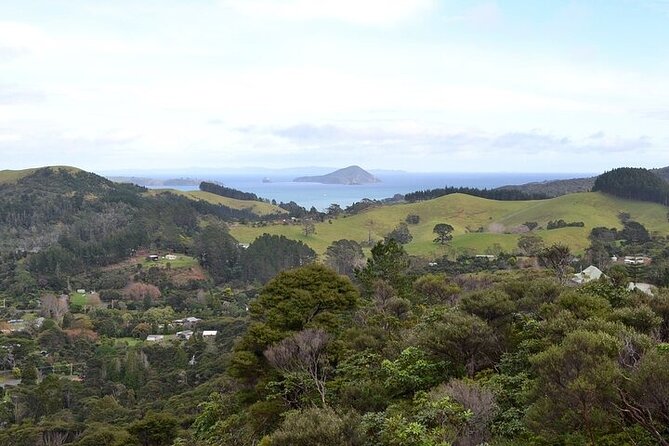
The drive portion is also part of the experience. You’ll travel roughly three hours through the Waikato Region and the Bay of Plenty, with a few photo opportunities along the way and additional stops when needed. That matters because it turns a long day into a sequence, not just seat time.
One practical tip: because you start early, pack like you’ll be out for most of the day. I’d bring a small day bag with sun protection, a light layer for the vehicle, and a backup snack since lunch is not part of the package. You’ll be thankful when you’re hungry but not at the right lunch window yet.
You can also read our reviews of more tours and experiences in Auckland.


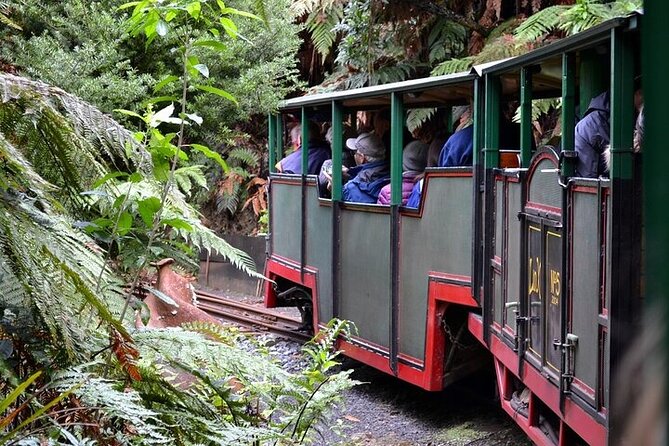
Driving Creek Railway (Eyefull Tour): the quirky train that’s actually worth it
Your first major “wow” stop is the Driving Creek Railway, including the Eyefull Tour train ride. This isn’t a basic train loop. The route climbs up with spirals, tunnels, viaducts, and reversing points—so the journey feels like it’s actively changing, not just sitting on rails.
The Eyefull Tower part is where the day earns its panoramic payoff. Once you’re at the top, you get wide views across the island-dotted Hauraki Gulf. Even if you’re not a scenery-spotter, the Eyefull Tower viewpoint gives you a sense of place—this is why the Coromandel looks the way it does, tucked between sea and hills.
What I like about this stop is the pacing. It’s structured (so you always know what’s next), but it still feels playful. And if you get a guide who tells stories well—names mentioned in past groups include Steve—you’ll often hear fun, on-the-ground context that makes the ride feel less like an attraction and more like a living slice of the region.
Practical note: plan for about an hour on the train experience here. Bring something you can keep comfortable for a ride (not too bulky, not too hot).
Hot Water Beach mineral pools: the hands-on part of the Coromandel
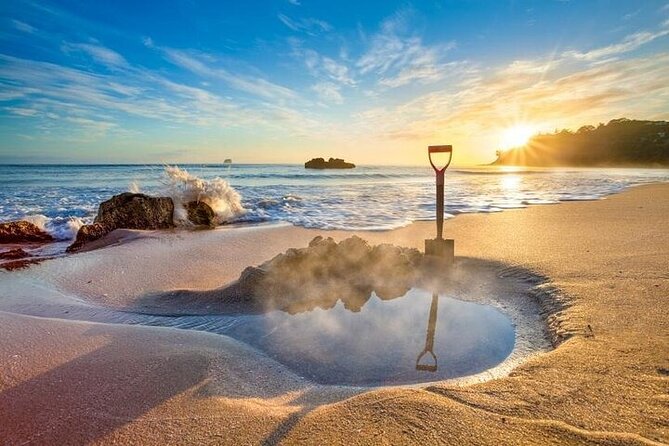
Then you shift from mechanical wonder to natural wonder at Hot Water Beach. This is the kind of place where the main rule is simple: bring what you need to enjoy the shoreline when the conditions are right—especially because access depends on tides.
At Hot Water Beach, you can relax, swim, or stroll along the shore. The big feature is the thermal mineral pools you can create by digging. The tour provides the spade, but you still need the rest of your kit: swimwear and a towel.
Here’s the reality check I’d plan around: the area can be wet, sandy, and uneven. A review tip that’s easy to act on is to wear slip-on shoes so you’re not fighting your footwear while you’re stepping in and out near the water. If you’re carrying flip-flops, keep them where you can reach quickly.
Because the tour start time may vary based on tide times, you’re not just showing up “whenever.” You’re arriving in a window that gives you a better chance to dig and enjoy the pools. That tide-aware scheduling is one of the reasons this stop feels worth it instead of chaotic.
Also, you’re on the coast in open conditions. Pack sun protection even if it’s morning. Coromandel weather can be changeable, and you want to be ready for both bright sun and cooler breezes off the water.
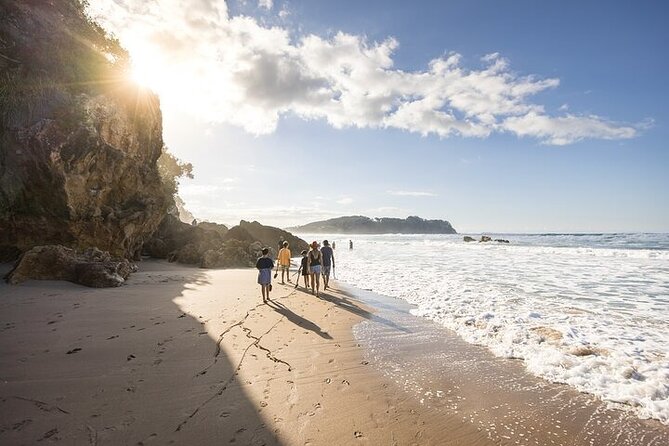
Cathedral Cove: walking there is part of the reward
Next comes the coastal highlight: the walkway to Cathedral Cove on the Coromandel Peninsula. This is one of those iconic stops where the journey matters just as much as the final view.
I like the logic of this sequence. After the train (indoor/outdoor mix but still a ride) and Hot Water Beach (hands-on, wet sand, and quiet moments), the coastal walkway gives you a stretch of moving at a natural pace. It’s not just a photo stop. The shoreline views build as you go, and you end up at a place people talk about for a reason.
One practical consideration: this portion depends on good weather. The experience requires decent conditions, and if conditions are off, your guide may adjust timing or plans. That doesn’t mean it’s a waste—it just means you should treat it as a weather-sensitive outdoor day.
If you’re the type who likes a “slow nature moment” instead of nonstop sightseeing, Cathedral Cove is where the day softens. Take your time on the path and don’t rush the viewpoint time. This is the Coromandel doing what the Coromandel does best: sea drama, coastal cliffs, and that feeling that you’ve left the city behind.
Price and logistics: what you’re paying for (and what you still need)
At $284.84 per person, this is not a cheap day trip. But you’re also not just buying fuel and a driver. You’re paying for a full loop that combines:
- Hotel pickup and drop-off from Auckland city center
- An air-conditioned vehicle for the long drive
- Snacks and bottled water
- Wi‑Fi on board
- All entry tickets and guided tours for the included attractions
- A professional driver/guide
- The spade provided for Hot Water Beach
- All taxes and fees handled in the price
That adds up. You’re essentially purchasing a packed, timed day that would be annoying (and often more expensive) to assemble on your own—especially when you factor in entry fees for multiple stops.
What isn’t included is just as important: lunch. Because you’re out for roughly 12 hours, you’ll want a plan for food. Some guides help you find good options at rest stops, and past experiences included solid cafe-style food on the way. Still, don’t assume lunch is covered in the cost. Bring extra snacks if you’re the kind of person who needs food before you’re hungry.
If you’re traveling as a couple or a small group, the “all-in” nature of admissions and transport is where the value lands. If you’re solo and feel confident driving yourself, you might be able to cut costs. But if your priorities are convenience and minimizing decision fatigue, this tour’s pricing starts to make sense.


Getting the most out of a 12-hour loop
This tour is built for a full day, not a quick highlights hit. You’ll spend a lot of the day in the vehicle between Coromandel stops, so comfort matters.
A few ways to make the day smoother:
- Dress in layers. The morning can feel cooler, especially near the coast.
- Keep a towel and swimwear in an easy-to-reach spot for Hot Water Beach.
- Use footwear that can handle sand and shore conditions.
- Bring a small bag for wet items after digging or swimming.
Group size is capped at 19 travelers, with at least 4 people required for the tour to run. That size is big enough to meet people but small enough that the guide can keep an eye on the group during key moments.
Guide quality can make a huge difference on days like this, and names that have come up include Steve and Warren—both described as bringing stories, history context, and fun facts that make long scenic stretches feel less like waiting and more like part of the show.
Who this Coromandel day tour suits best

This is a strong fit if you want:
- A classic Coromandel “greatest hits” day from Auckland
- A rail experience that’s scenic and slightly offbeat
- Hands-on nature time at Hot Water Beach, not just sightseeing from a parking lot
- A guided plan that accounts for tide timing and weather reality
It’s also ideal if you’re the kind of traveler who likes structure. Even though the day has natural moments, you’re never fully on your own. Pickup, transport, admissions, and key guided segments are handled.
If your style is ultra-independent—self-driving every stop, lingering all day, skipping scheduled activities—then you might feel boxed in. But for most people who want a memorable day without the planning burden, this tour hits the sweet spot.
Should you book the Coromandel Day Tour from Auckland?
I’d book this if your goal is a full Coromandel day that mixes quirky (the Driving Creek Railway) with real hands-on nature (Hot Water Beach digging) and ends with a classic coastal walk (Cathedral Cove). The included admissions, transport, and tide-aware timing make it a time-efficient way to get three major highlights in one go.
I’d think twice if you really hate early starts, you don’t like weather-dependent outdoor plans, or you know you’ll need lunch included to feel satisfied with the value. Since lunch isn’t included, plan ahead so the day doesn’t hinge on finding food at the right moment.
FAQ
What time does the Coromandel day tour start?
The start time is listed as 6:00am, though the exact start time may vary based on tide times at Hot Water Beach.
How long is the tour?
The duration is approximately 12 hours.
Is pickup and drop-off included?
Yes. Hotel pickup and drop-off are included for Auckland city center.
What’s included in the price?
The price includes snacks, bottled water, an air-conditioned vehicle, Wi‑Fi on board, entry tickets & guided tours, a professional driver/guide, and a spade provided for Hot Water Beach. All taxes and fees are included too.
Is lunch included?
No. Lunch is not included.
Is there a chance the tour gets canceled?
Yes, the tour requires a minimum number of travelers (4). If the minimum isn’t met, you’ll be offered a different date/experience or a full refund. The experience also requires good weather, and if it’s canceled due to poor weather, you’ll be offered a different date or a full refund.