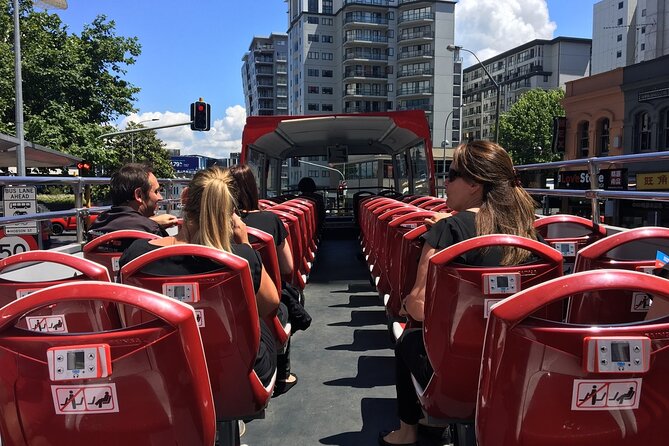
REVIEW · AUCKLAND
Auckland Explorer: Sightseeing Hop-on Hop-off Tour
Book on Viator →Operated by Auckland Explorer Bus · Bookable on Viator
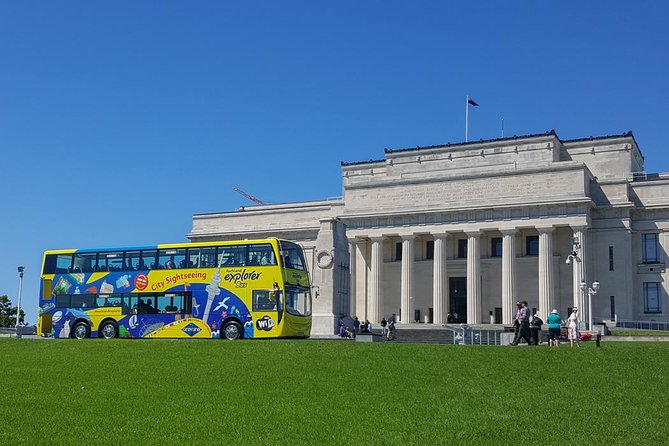
Auckland’s hills are easier by bus. The Auckland Explorer hop-on hop-off tour gives you a smart, low-effort way to map the city fast, with English audio and the freedom to hop off for stops like Sky Tower, Auckland Museum, and Parnell Village. It’s built for first-timers and short-stay visitors who want big views and key landmarks without building a full itinerary from scratch.
I love the flexibility of choosing when to hop on and off, and I love the onboard English audio commentary that keeps you oriented while you travel between neighborhoods. I also like the practical extras: air-conditioning on board and WiFi if you want to check the next stop, your route, or opening times.
One possible drawback: you may still hit crowds and wait times, especially on busy cruise-ship days. The buses can add extra coaches, but headways can slip, and that matters if you’re racing a tight schedule.
In This Review
- Key highlights at a glance
- Getting Oriented: Downtown Start and the Loop Concept
- Price and Pass Value: What $43.44 Buys You
- Comfort and On-Board Extras: WiFi, Air-Conditioning, and Open-Air Seats
- Stop-by-Stop Guide: What Each Area Adds to Your Auckland Day
- Sky Tower (SkyCity Auckland): The skyline anchor
- Auckland Art Gallery: Culture without the museum fatigue
- Westfield Newmarket (Broadway/359): Shops, cafes, and a reset
- Auckland Museum and War Memorial Museum: Big picture history
- Holy Trinity Cathedral and Parnell Village: Heritage plus a good wander
- Bastion Point Lookout: One of Auckland’s attitude changes
- Kelly Tarlton’s SEA LIFE Aquarium (Sea Life): Family-friendly and fun
- Domain Wintergardens: A green pause
- Mount Eden: The hike you’ll feel
- Eden Park and Auckland Zoo: Choose your pace
- MOTAT Museum of Transport and Technology: For curious minds
- Timing Reality: Waiting, Crowds, and Route Confusion
- How to Build Your Best Day (Without Overplanning)
- Who This Tour Fits Best (And Who Might Skip It)
- Should You Book the Auckland Explorer Hop-On Hop-Off Bus?
- FAQ
- How long does the hop-on hop-off loop take?
- Is my ticket valid for 1 day or 2 days?
- What’s included with the ticket?
- Are food and drinks included?
- What happens if the tour is canceled due to weather?
- Can I cancel for a full refund?
Key highlights at a glance
- On-board English audio to keep you oriented without guesswork
- Flexible 1- or 2-day pass so you can pace your day (or spread it out)
- A wide hit list of stops from Sky Tower to Parnell and Kelly Tarlton’s
- WiFi and air-conditioning for comfort between hops
- Route color changes can happen around the museum area, so expect transitions
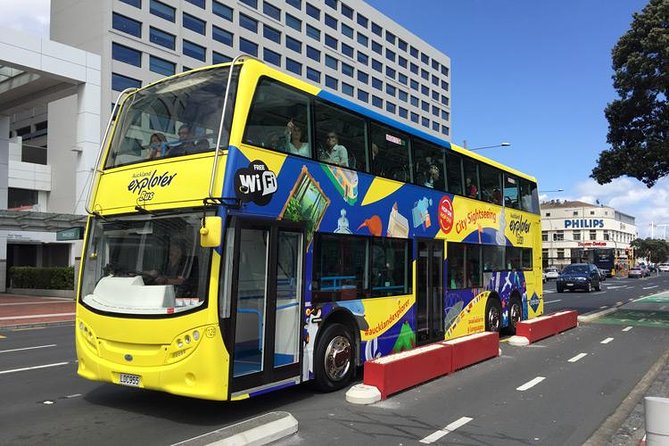
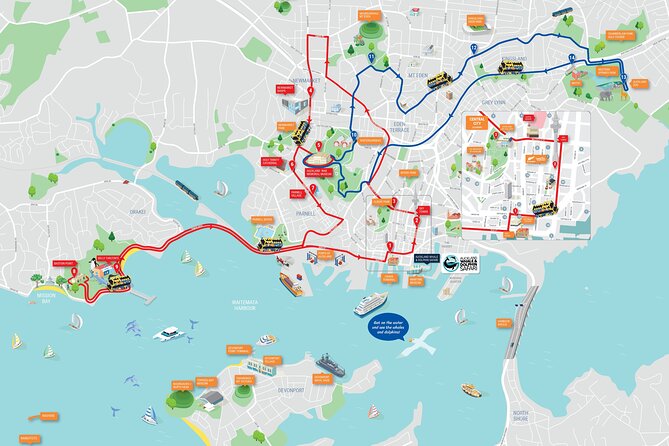
Getting Oriented: Downtown Start and the Loop Concept
Your day starts at Customs Street East (the main departure point), with buses running through central Auckland and key attractions. Plan on an easy rhythm: ride the loop for the big-picture overview, then hop off where you want time on foot.
The loop is designed to be quick, roughly about an hour to complete. That matters because Auckland’s neighborhoods sit on hills and spreads out by water, so you can burn a lot of energy walking if you don’t have a plan.
On board, you’ll get English audio guidance as you travel. You don’t have to stare at maps every few minutes, and you’ll generally know what you’re looking at before you get off to explore.
You can also read our reviews of more tours and experiences in Auckland.


Price and Pass Value: What $43.44 Buys You
At about $43.44 per person, this isn’t the kind of ticket you buy just for one scenic ride. It makes more sense when you treat it like transportation plus orientation: you’re paying to avoid repeated taxi or rideshare hops across town.
The pass can be valid for one or two days, which is a big deal for value. If you’re only in Auckland for a short window, a one-day pass can help you cover several major sights without overplanning. If you have a second day, the two-day option helps you avoid the “too rushed” problem that hits most first-timer city tours.
Also, the ticket includes a practical onboard setup: air-conditioned vehicle and WiFi on board. Those are small comforts, but they reduce friction if the weather turns or you need quick trip planning.
Comfort and On-Board Extras: WiFi, Air-Conditioning, and Open-Air Seats
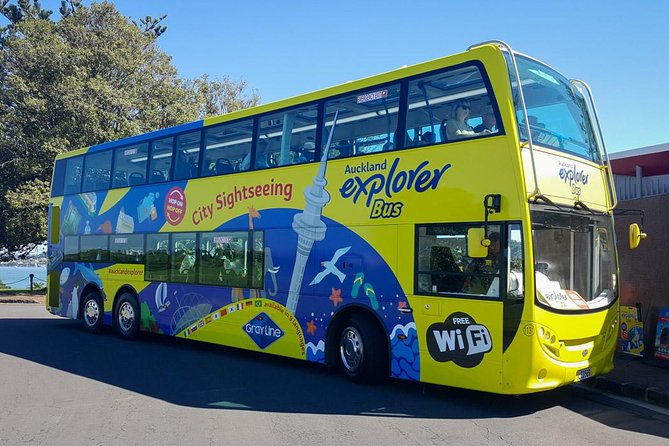
This bus tour is set up for comfort. You’re riding an air-conditioned vehicle, which is welcome when Auckland weather shifts between sunny and cool.
One standout for many riders is the onboard audio delivery. The tour uses a speaker system, so you can listen without needing personal headphones, as long as you’re okay with being close enough to hear clearly.
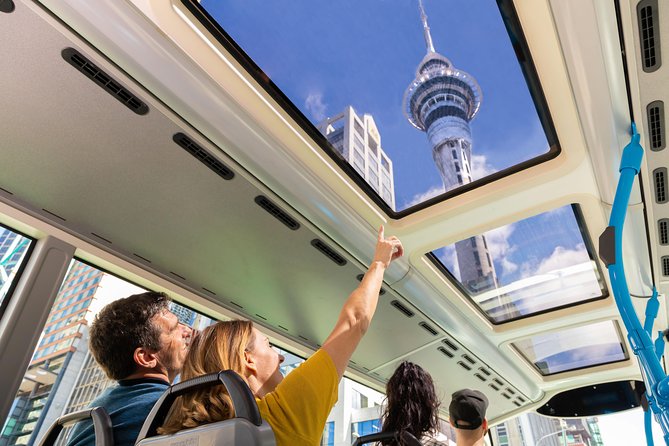
You might also get the option to sit up top on an open-air section for parts of the ride, which is great for skyline moments. Auckland can look even better when you’re up higher, especially around waterfronty areas and viewpoints.
Stop-by-Stop Guide: What Each Area Adds to Your Auckland Day
Here’s how I’d think about the stops: some are for iconic skyline views, some are for New Zealand history and culture, and some are for “wander time” neighborhoods where the city feels local.
Sky Tower (SkyCity Auckland): The skyline anchor
The tour’s Sky Tower stop is the easy win for first-timers. Even if you don’t go up (it depends on your budget and time), just being dropped near the tower helps you understand Auckland’s layout and how the central city sits above the water.
It also gives you a natural “meet-up point” for your day. If your timing gets messy at other stops, Sky Tower often acts like a reliable anchor back toward central Auckland.


Auckland Art Gallery: Culture without the museum fatigue
At the Auckland Art Gallery stop, you’re positioned for a calmer indoor break from walking and hills. It’s also an easy way to swap scenery for something more thoughtful.
If you’re the kind of traveler who likes seeing what a city chooses to display, this stop is worth it even for a shorter visit. Just keep your timing tight if your day includes higher-effort stops like Mount Eden.
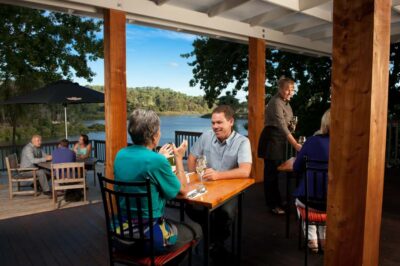
Westfield Newmarket (Broadway/359): Shops, cafes, and a reset
The stop at 359 Broadway, Westfield Newmarket is practical. It’s a place to grab food, reset your energy, and get out of the “only sightseeing” mode for a bit.
This can be especially useful if you’re mixing major attractions with lighter time on foot. Think of it as your buffer stop.
Auckland Museum and War Memorial Museum: Big picture history
The Auckland Museum stop is one of the key nodes on the route. You’re dropped near the South entrance, and this is also where route changes can happen around the area.
Close by, you’ll also see the Auckland War Memorial Museum stop referenced for departures. This is the kind of visit that rewards even a partial visit because the exhibits are organized for making sense of New Zealand’s story, not just piling artifacts in a room.
A practical note: because the museum area is a transition point, keep an eye on where you are heading next. It’s easy to lose track if you assume you’re staying on the same route the whole time.
Holy Trinity Cathedral and Parnell Village: Heritage plus a good wander
At Holy Trinity Cathedral (near the corner of St Stephens Ave and Parnell Rd), you’ll get an architectural and heritage contrast to the busier downtown feel.
Then it’s on to Parnell Village (the stop near Parnell Road). Parnell is one of those Auckland neighborhoods where a hop-off feels like starting a mini-walk rather than just “standing near something.”
If you want a place to browse at a comfortable pace, this is a good pick. It’s also a stop people use for snacks and downtime before heading back toward central areas.
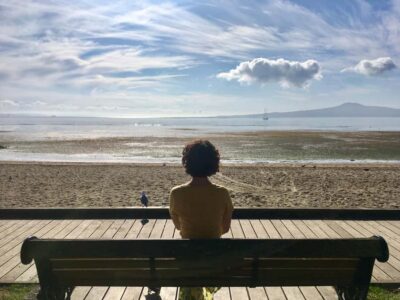
Bastion Point Lookout: One of Auckland’s attitude changes
The Bastion Point Lookout stop is about views and perspective. Auckland’s waterfront and harbor energy changes fast as you move around the city, and lookouts help you connect the dots between neighborhoods.
If you only have a small amount of time for viewpoints, prioritize this kind of stop over a quick photo-only moment. Even a short stretch looking out can make the rest of the day feel more connected.
Kelly Tarlton’s SEA LIFE Aquarium (Sea Life): Family-friendly and fun
The stop at 23 Tamaki Drive for Sea Life Kelly Tarlton’s targets an attraction that’s easy to love, especially if you’re traveling with kids or you just want something different from churches and towers.
The value here is simple: it’s an activity you can’t replicate from a bus seat. It also breaks up the city sightseeing rhythm so the day doesn’t blur together.
Domain Wintergardens: A green pause
The Domain Wintergardens stop helps you shift from attractions to atmosphere. This is a good place to take a breath, especially if you’ve been riding bus-to-bus for hours.
It’s also useful for travelers who want “Auckland’s garden city feel” without committing to a long hike or a bigger-ticket museum.
Mount Eden: The hike you’ll feel
The Mount Eden stop is for people who don’t mind a climb. Auckland is hilly, and Mount Eden is one of the most famous examples. The good news is the payoff is visual, the kind of wide view that makes you understand how Auckland spreads.
The practical drawback is effort. If you know you’re limited on stairs or steep walking, plan how much time you want at the top. You can still hop off to see the area, but decide in advance if you’re going all the way up.
Eden Park and Auckland Zoo: Choose your pace
The route includes stops for Eden Park and Auckland Zoo. Eden Park is useful if you’re into sports history or you just want a sense of Auckland’s major venues. The Zoo stop is a bigger commitment, since it’s easier to lose time there.
I like using these as decision points. If you feel energetic, go for Eden Park and maybe a short walk. If you want a full block activity, Zoo pairs better with a longer stretch off the bus.
MOTAT Museum of Transport and Technology: For curious minds
The stop for MOTAT Museum of Transport and Technology is great if you prefer interactive learning over purely visual attractions. It’s also a strong option when the weather isn’t perfect, because you can focus on indoor exhibits without ruining your schedule.
This is the sort of stop that keeps the city tour from becoming a single theme. Auckland is full of “look at this” sights, and MOTAT is “do you want to know how it works.”
Timing Reality: Waiting, Crowds, and Route Confusion

This is the part that can make or break your day, so I’ll be blunt.
Buses depart regularly on a seasonal schedule, but Auckland can get busy, and cruise-ship days can overload the system. Extra coaches can be added, yet you may still see longer wait times. If you’re on a tight timeline, keep buffer time between hops.
Route transitions can also feel confusing. The routes can be color-coded (red and blue show up in the system), and they intersect around the museum area. If you stay on the bus when it switches routes, you might end up seeing more than you expected, or you might miss the exact timing you planned. Either way, check the stop announcements so you don’t accidentally do extra loops when you wanted a shorter plan.
Also, do not assume every bus will run perfectly like clockwork. Traffic and crowds happen. If the bus passes you once, don’t panic. Just reset your plan and use the next scheduled departure as your new checkpoint.
How to Build Your Best Day (Without Overplanning)
Here’s a simple strategy I’d use if I were planning this as a first-time visit.
- Start with one continuous loop so you get orientation.
- Pick 2 or 3 priority hops for real time on foot or inside attractions.
- Use the neighborhood stops (like Parnell and Newmarket) as your meal and reset points.
The key is choosing what kind of time you want. Auckland has lots of hills, and not all stops are equal in walking effort. For example, Mount Eden is a planned effort, while Parnell Village is a relaxed wander.
If you’re traveling on a cruise day, prioritize the skyline and central icons first, then only add second-tier stops if your timing holds. This tour can be a perfect port-day tool, but you’ll get the best outcome when you’re not trying to squeeze in everything.
Who This Tour Fits Best (And Who Might Skip It)
This tour shines if you want quick orientation, major sights, and flexibility. It’s a good fit for:
- First-time visitors who want a shortcut to Auckland highlights
- People with limited mobility for long walks between far-apart stops
- Travelers who don’t want to plan a detailed driving or rideshare schedule
- Families who want easy drop-offs for attractions like Sea Life Kelly Tarlton’s
It may be less satisfying if you hate waiting. Some passengers experience long waits at stops when crowds build, and if you’re the type who wants a strict timetable, you may find the pacing frustrating.
Should You Book the Auckland Explorer Hop-On Hop-Off Bus?
I’d book it if your goal is getting the big picture fast and you want a practical plan you can adjust on the fly. The onboard English audio, WiFi, and air-conditioned comfort make it easier to use the bus as your backbone, not just as a ride.
If you hate uncertainty around timing, go in with a buffer plan. On busy cruise-ship days, headways can stretch, and you’ll do better when you treat the bus as flexible, not precise.
If your itinerary includes Sky Tower, Auckland Museum, and at least one viewpoint or attraction stop, this tour is a solid value way to string those together without burning hours getting from place to place.
FAQ
How long does the hop-on hop-off loop take?
The full loop is about one hour. In practice, you’ll likely stretch your day by hopping off for sightseeing and then reboarding later.
Is my ticket valid for 1 day or 2 days?
You can choose a pass that’s valid for one or two days. That flexibility is part of what helps the tour work for both short and longer stays.
What’s included with the ticket?
The ticket includes the hop-on hop-off tour, informative English commentary, air-conditioned vehicle, and WiFi on board. GST is also included.
Are food and drinks included?
No. Food and drinks are not included with the bus ticket, so plan to buy meals or snacks at stops like Newmarket or Parnell Village.
What happens if the tour is canceled due to weather?
The experience requires good weather. If it’s canceled because of poor weather, you’ll be offered a different date or a full refund.
Can I cancel for a full refund?
Yes, you can cancel for a full refund if you cancel at least 24 hours before the experience’s start time.