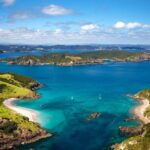
REVIEW · AUCKLAND
Auckland Scenic Day Tour Full-Day- 8 HOURS
Book on Viator →Operated by Auckland Scenic Tours · Bookable on Viator
Auckland can feel spread out. This day tour strings together coast, parks, neighborhoods, volcano views, and included winery tasting in one smooth, photo-friendly loop with a small group feel. I like that hotel pickup and an air-conditioned ride mean you can focus on the views instead of traffic and parking.
The one thing to plan for is time on your feet: there’s light walking at multiple stops, and two sections really do ask for good mobility and stamina.
In This Review
- Key points to know before you go
- Auckland in 8 Hours: What This Tour Does Better Than DIY
- Pickup, Minivan Comfort, and the Real Meaning of Small-Group Touring
- Harbour Bridge to Devonport: The North Shore Start That Gets Your Bearings Fast
- North Head Historic Reserve and Achilles Point: Volcano Views With a Side of History
- Cornwall Park One Tree Hill and Auckland Domain: Green Space, Not Just Viewpoints
- Tamaki Drive, Viaduct Harbour, and Ponsonby: Seeing the City Like Someone Who Lives There
- Mount Eden and the Auckland Crater Set: The Stop That Feels Like a Reset Button
- Riverhead Lunch Stop: A Taste of Old Auckland (And Why Lunch Matters)
- Soljans Estate Winery and Kumeu Wine Trail: Included Tastings Without the Driving Headache
- Muriwai Beach and the Gannet Colony: Black Sand, Sea Air, and Wildlife Timing
- How the Full-Day Timing Works (and Where You Might Feel Rushed)
- Price and Value: Why $133.42 Can Make Sense Here
- Should You Book This Auckland Scenic Day Tour?
- FAQ
- How long is the Auckland Scenic Day Tour?
- What time does the tour start?
- Where is the meeting point?
- Does the tour include hotel pickup and drop-off?
- What’s included in the price?
- Is lunch included?
- How much walking is involved?
- Is there a minimum age?
- What happens if weather is bad?
Key points to know before you go
- Hotel pickup and round-trip transport so you start fast and don’t worry about a rental car
- 360-degree volcano viewpoints from Mount Eden and North Head Historic Reserve for skyline photos
- Wintergardens at Auckland Domain plus a Fernery where you can see the silver fern
- Two scenic coast-to-winery passes: Muriwai black-sand beach and the Kumeu Wine Trail area
- Maximum 14 travelers keeps the day from feeling like a moving crowd
- Guides like Danny, Mike, and Brenda are repeatedly praised for storytelling and keeping things fun
Auckland in 8 Hours: What This Tour Does Better Than DIY
This is the kind of day trip that works because it compresses distance. Auckland is a big, sprawled city, and the highlights are scattered across multiple directions. With the tour’s route, you get a cross-isthmus sampler without turning your day into a drive-think-park-repeat exercise.
I also like that the schedule is built around viewpoints. You’re not stuck only in busy streets. You get vantage points over Waitematā Harbour, plus volcano craters and headland lookouts that make Auckland look like a city drawn by a postcard artist.
The “small group” setup matters too. When you’re on a one-day timeline, it’s easier to hear your guide, ask questions, and make sure you’re at the right spot for photos—especially during short stops.
You can also read our reviews of more tours and experiences in Auckland

Pickup, Minivan Comfort, and the Real Meaning of Small-Group Touring
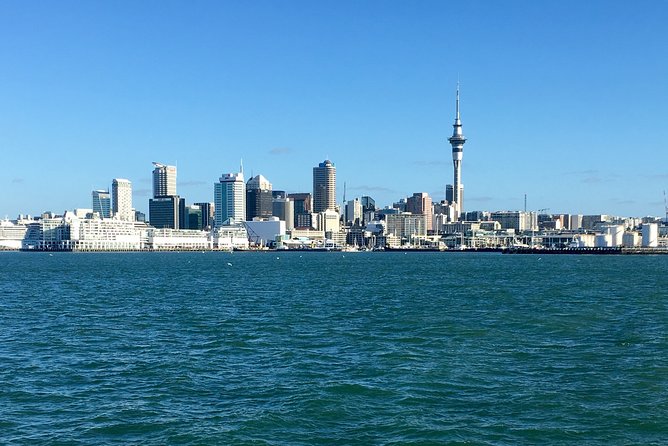
The tour includes hotel pickup and drop-off for centrally situated downtown hotels or cruise ships. Even if you’re not picked up right at your door, the posted start point is near Sky Tower on Victoria Street West, and the day runs from 8:30 am for about 8 hours total.
You’re riding in an air-conditioned vehicle, which is a big deal in Auckland. Even on mild days, coast breezes can swing the temperature fast, and you’ll likely be switching between outdoor viewpoints and indoor greenhouse time.
One review-based caution I’d take seriously: the afternoon can feel warm for people seated in the back on some vehicle layouts. I’d pack a light layer and plan to bring water of your own, since the tour listing only calls out wine tasting and lunch as separate from the provided inclusions.
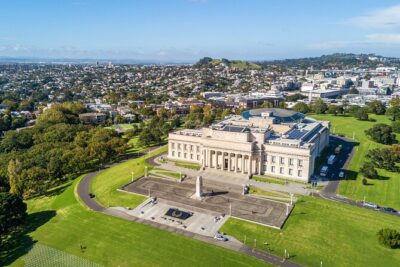
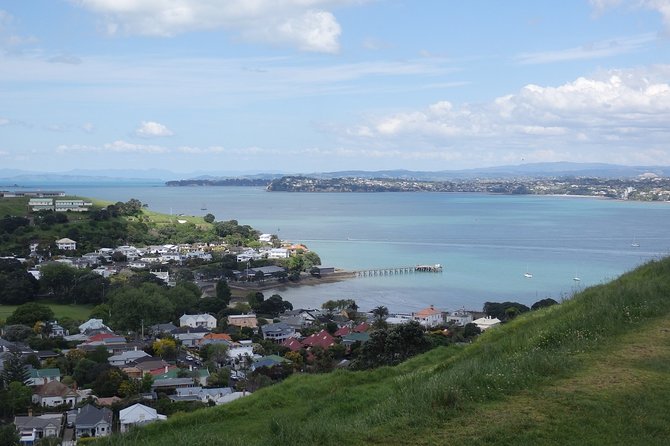
Harbour Bridge to Devonport: The North Shore Start That Gets Your Bearings Fast
The day begins with a drive over the Auckland Harbour Bridge (built in 1959), where you get major photo opportunities over the city and beyond. From there, you head to Devonport, a North Shore suburb with old wooden villas and a ferry-orientated vibe. It’s the kind of place that makes Auckland feel like a port city rather than just a skyline.
A quick stretch and a lookout moment here helps you understand how the city sits against the water. That context pays off later when you pass similar viewpoints from different angles.
If you’re prone to motion sickness, note that you’ll be doing a lot of scenic driving along the coast. The route is smooth, but it’s still a full-day ride with frequent viewpoint stops.
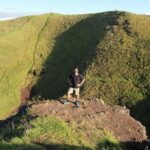
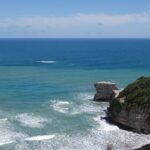
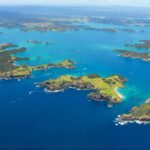
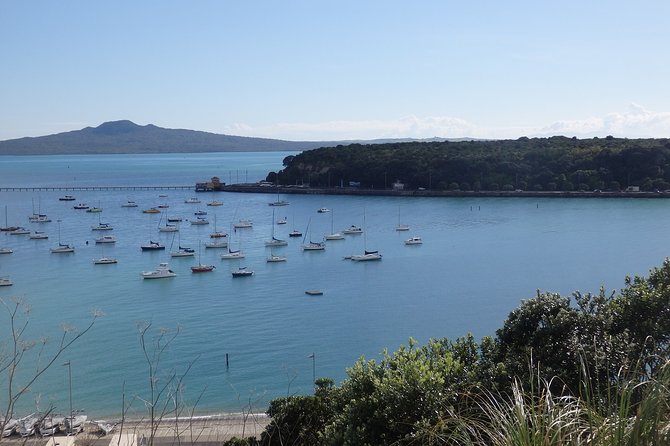
North Head Historic Reserve and Achilles Point: Volcano Views With a Side of History

North Head Historic Reserve is one of the tour’s best early wins. The experience includes walking around the volcano area and enjoying simply spectacular 360-degree views over Auckland. The reserve is also known for an underground “mini city” of tunnels—some of which you may journey into—so it’s not only a view stop.
Expect a flat walk, but don’t mistake that for a zero-effort stop. It’s outdoors, and you’ll likely spend time moving between viewpoints. Comfortable shoes matter here.
Then you move to Achilles Point for harbor history and more sea-and-city perspectives. The stops are short by design, and that’s good: you see a lot without spending your whole morning parked in one place.
Cornwall Park One Tree Hill and Auckland Domain: Green Space, Not Just Viewpoints
After the coast and volcanoes, the tour shifts into parks and botanical sights. At Cornwall Park, you’ll visit One Tree Hill, a crater hill with important significance to Māori people. This stop adds meaning beyond scenery—you’ll get context on what you’re looking at, not just where to take your photo.
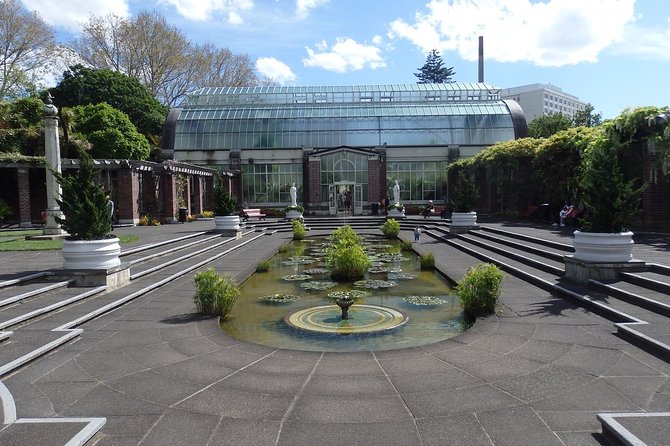
Next is Auckland Domain, where the Wintergardens are a highlight. You’ll see two stunning Wintergardens and the glasshouses, then get time at the Fernery to see and touch the silver fern, one of New Zealand’s best-known symbols.
This is a smart balance in the day: after open-air coastal viewpoints, these greenhouse stops give you a break from wind and sun. On rainy days, they can make the tour feel much more comfortable.


Tamaki Drive, Viaduct Harbour, and Ponsonby: Seeing the City Like Someone Who Lives There
Tamaki Drive is a dramatic coastal road that runs along Waitematā Harbour. As you travel it, you’ll pass by Viaduct Harbour and have chances to spot Sky Tower looming above the skyline. These are the kinds of landmarks you can’t really get from the inside looking at a map.
You also drive through Ponsonby, one of Auckland’s hip neighborhoods, with a chance to peek at shops along Ponsonby Road. This isn’t a long wander block, but it gives you a sense of the neighborhoods’ character.
Then you loop back into other central areas for quick orientation: the goal isn’t “spend all day shopping.” It’s to help you understand where Auckland’s energy lives, so your remaining free time later feels more intentional.
Mount Eden and the Auckland Crater Set: The Stop That Feels Like a Reset Button
Mount Eden is the tour’s “big view” payoff. You’ll head to Auckland’s highest volcano point (about 196 metres) and get another round of 360-degree views. You’ll also learn that Auckland sits on 56 extinct volcanoes, and Mount Eden is one of the largest volcanic craters in the city.
This stop is about being able to see the city’s scale. From the crater rim, Auckland stops looking like separate neighborhoods and starts looking like a connected patchwork of land and water.
One more practical note: this is also one of the places where walking feels more real than a quick viewpoint photo. If your mobility is limited, this is the area to think about seriously before booking.
Riverhead Lunch Stop: A Taste of Old Auckland (And Why Lunch Matters)
Lunch isn’t included. After your morning and early afternoon, you’ll head out toward Riverhead and get about 45 minutes there for food on your own.
The upside is the setting: Riverhead is described as historic dating back to 1857, overlooking the Waitematā Harbour. That matters because it makes your meal feel like part of the trip, not a rushed calendar checkbox.
If you want a smoother meal pace, pick a spot close to where you’ll be dropped off. With only a set time window, it’s easy to lose minutes hunting for the “perfect” lunch.
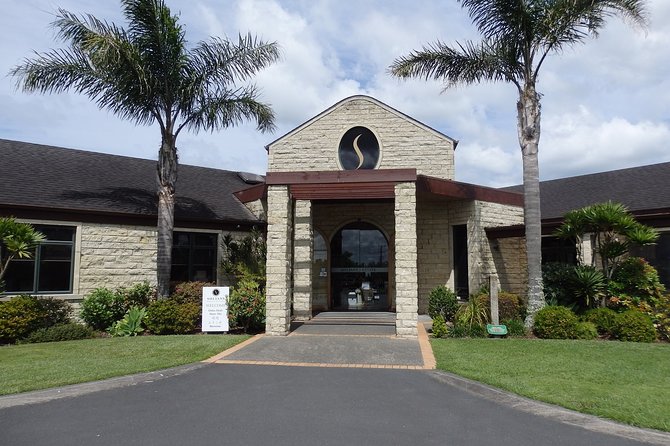
Soljans Estate Winery and Kumeu Wine Trail: Included Tastings Without the Driving Headache
New Zealand is famous for wine, and this tour gives you that experience without requiring you to drive afterward. The itinerary includes a winery tasting at Soljans Estate Winery (about 30 minutes, with tasting included), and it also schedules a wine tasting stop along the Kumeu Wine Trail area.
This is a real value point. If you drove yourself, you’d spend time coordinating transport and parking, and you’d still be at the mercy of traffic between wineries and return routes. Here, the plan is built in.
Keep expectations realistic, though: tastings are typically short. Think of it as a chance to sample and learn, not a full winery tour and meal. If you love wine, you’ll probably want to do more on a later day with a separate, longer plan.
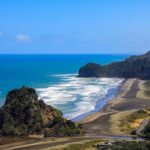
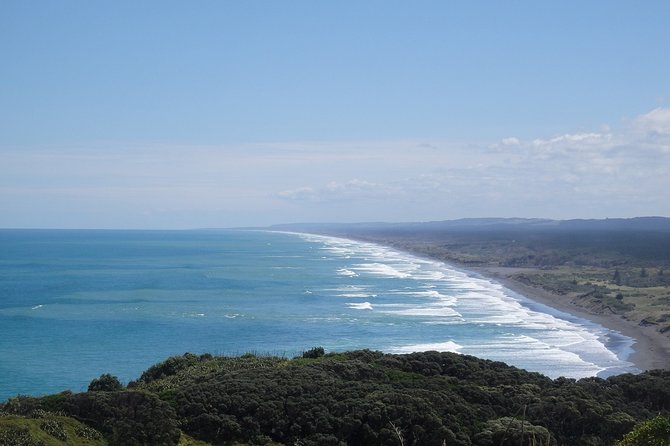
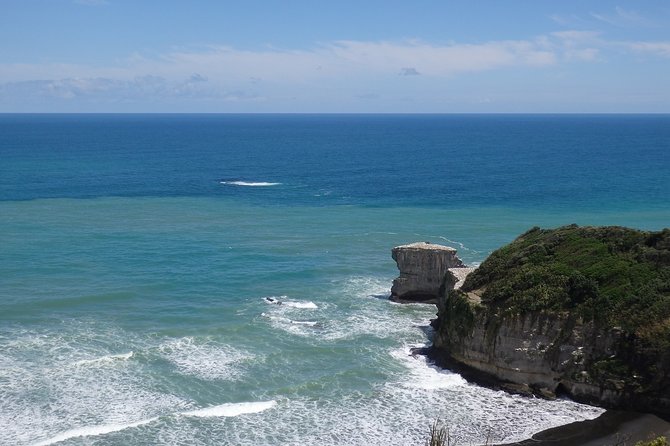
Muriwai Beach and the Gannet Colony: Black Sand, Sea Air, and Wildlife Timing
In the last stretch, you head to the west coast for Muriwai Beach, known for its black sand. You’ll stroll the beach and then visit one of New Zealand’s most important Gannet breeding colonies.
This is the best kind of nature stop: it’s not a museum of wildlife, it’s a live colony scenario. You’ll get sea air, wide-open views, and that feeling of standing at the edge of a larger world.
One caution: this area can be windy and exposed, and you’ll be outside for your walk. Dress for that, not for the weather forecast that looked fine from your hotel lobby.
How the Full-Day Timing Works (and Where You Might Feel Rushed)
The tour packs in a lot: harbors, headlands, parks, crater viewpoints, a winery tasting window, a meal stop, and a west-coast wildlife beach. That makes it great for first-time orientation, but it also means you’re living in “short stop” mode.
Most stops are around 15 to 30 minutes, with the main longer blocks being North Head, Auckland Domain, and the lunch window at Riverhead. If you’re the type who wants to linger, you may feel the day is tight—especially if the weather forces you to slow down for comfort and footing.
I’d plan your expectations like this: you’re buying breadth and big viewpoints, not a leisurely crawl through one area.
Price and Value: Why $133.42 Can Make Sense Here
At about $133.42 per person, you’re paying for an 8-hour loop that includes hotel pickup/drop-off, an air-conditioned vehicle, a driver/guide, and wine tasting. In Auckland, that’s not only about transport—it’s about saving the time cost of driving between scattered highlights.
If you were to DIY, you’d likely spend extra on parking, petrol, and the mental tax of managing routes, timing, and where to stop. This tour handles it for you, and the route is optimized for viewpoints you can’t easily string together efficiently in a single day.
The value gets even better if you’re traveling with limited car access or you just don’t want to worry about getting back to your accommodation after tasting wine.
Should You Book This Auckland Scenic Day Tour?
Book it if you have just one day and you want a guided hit list of Auckland from coast to crater to wine country. It’s also a strong pick if you like stories and quick orientation, because multiple guides (including Danny and Mike, plus Brenda in several comments) are praised for keeping the day fun and informative.
Skip it—or switch to a shorter option—if you’re sensitive to long days, dislike walking outdoors, or need lots of time to sit and relax at each stop. One downside that shows up in feedback is that the afternoon can feel long, and the ride comfort can depend on where you sit.
FAQ
How long is the Auckland Scenic Day Tour?
The tour is listed as about 8 hours.
What time does the tour start?
The start time is 8:30 am.
Where is the meeting point?
The posted meeting point is Sky Tower, Victoria Street West, Auckland Central.
Does the tour include hotel pickup and drop-off?
Yes, hotel pickup and drop-off are included for centrally situated downtown hotels or cruise ships.
What’s included in the price?
Included items are hotel pickup and drop-off, the driver/guide, transport by air-conditioned minibus, and wine tasting.
Is lunch included?
No, lunch is not included. You’ll stop in Riverhead for lunch on your own.
How much walking is involved?
The tour recommends a moderate physical fitness level. Some easy walking is involved, and two activities require good walking ability, so it is not recommended for agility or mobility issues.
Is there a minimum age?
The minimum age is 10 years.
What happens if weather is bad?
This experience requires good weather. If it’s canceled due to poor weather, you’ll be offered a different date or a full refund.