REVIEW · AUCKLAND
Auckland Highlights 4 Hrs city Tour
Book on Viator →Operated by Stevong Travel · Bookable on Viator
Four hours, and Auckland already clicks. This half-day highlights loop is built for first-time visitors who want the big sights without wasting time, with port or hotel transfers and a small group capped at five. You’ll get an efficient route through volcano viewpoints, green parks with farm animals, beach views, and a classic harbor photo spot.
I especially like how the tour uses a comfortable private vehicle to connect a few very different parts of the city. You also get the feeling that the guide is there to help you get your bearings fast—cruise passengers in particular benefit from the way pickup and drop-off are handled.
One thing to think about: stop times are short on purpose (often 15 to 40 minutes), so if you want long wandering time or deep CBD history, you’ll probably want a longer tour.
In This Review
- Key highlights to know before you go
- A 4-hour Auckland loop that actually fits real schedules
- Transfers matter: cruise passengers and first-timers get the win
- Mount Eden: the volcano viewpoint stop (and how to use your 40 minutes)
- Cornwall Park: volcanic park scenery, farm animals, and time for calm
- Mission Bay: beach energy and a quick bite plan (but no food is included)
- Westhaven Marina: the harbor bridge photo moment (15 minutes well spent)
- The small-group pace: comfortable, but expect limited time at each stop
- Guides and comfort: what you’re paying for beyond the checklist
- Price and value: is $89.98 worth it?
- Who should book this Auckland Highlights tour
- Should you book? My take
- FAQ
- How long is the Auckland Highlights tour?
- What does the tour cost?
- How many people are in the group?
- Are hotel or port transfers included?
- Where does the tour go?
- Is admission required for the stops?
- Does the tour include food or drinks?
- What kind of ticket do I receive?
- What happens if weather is poor?
- Can I cancel for free, and how far in advance?
Key highlights to know before you go
- Small group up to 5 travelers for less chaos and more personal attention
- Port or hotel transfers included so you’re not hunting pickup points
- Mount Eden viewpoint gives that iconic Auckland-from-above angle
- Cornwall Park blends volcanic greenery with farm animals and flowers
- Mission Bay + Westhaven Marina deliver easy beach time and harbor views
- Short, well-paced stops keep the itinerary moving in just 4 hours
A 4-hour Auckland loop that actually fits real schedules
Auckland can feel spread out. This tour helps you stitch it together quickly—volcanic views, a central park with grazing animals, then down to the water and the marina. It’s the kind of half-day plan that makes sense if you’re here for a first taste, not a full deep-dive.
The best part is the structure. You’re not just driving around looking out windows—you’re getting a few focused stops where you can step out, take photos, and get the vibe of each area. That is a big deal when your time is limited.
You can also read our reviews of more city tours in Auckland


Transfers matter: cruise passengers and first-timers get the win
If you’re arriving by cruise, this is the sort of tour that removes friction. You get port pickup and drop-off, and the tour also offers hotel pickup and drop-off. Instead of building your day around buses and schedules, you can start seeing the city almost right away.
In the feedback, people also praise clear meeting communication and punctual starts. That matters in Auckland traffic, and it’s the difference between a relaxing afternoon and a frantic scramble before you miss the tour.
The private-vehicle approach is practical too. With a small group, you usually spend less time waiting, and you can move as a unit between points. For anyone who doesn’t want to fight the wharfs for transport, this is an easy win.
Mount Eden: the volcano viewpoint stop (and how to use your 40 minutes)
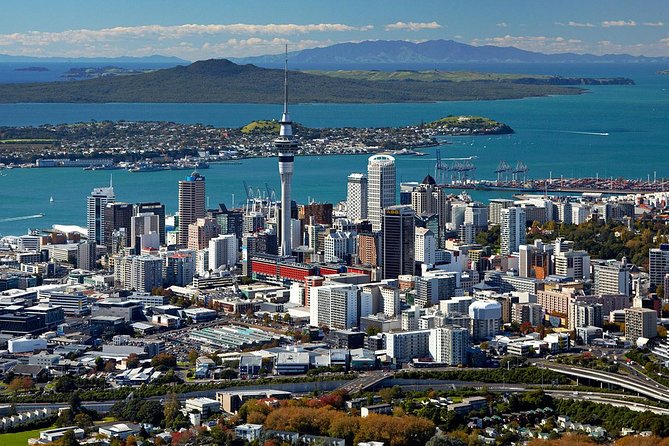
Mount Eden is Auckland’s classic volcano hill, right in the city centre area. It’s the kind of stop where, even if you’ve seen photos before, you still get that wow moment when you look across the city.
You’ll have about 40 minutes at the top area for walking the track and taking in the view. Since you’ll be outside, I suggest bringing a light layer even if it’s warm—weather can shift fast around open viewpoints.
What makes this stop work for first-time visitors is the “geography lesson” it gives you. Auckland’s shape and volcanic features start to make sense the moment you see it from above. You’ll leave with a mental map that makes later parts of the trip easier to understand.
Photo note: go early in your stop time if you want less crowding. Even on shorter tours, the view is the star, so treat the first half of your stop like prime time.
Cornwall Park: volcanic park scenery, farm animals, and time for calm
Next up is Cornwall Park, which feels like a breather after the city drive. It’s known for its park scenery, and it also includes farm animals—so you can look for sheep and cows while enjoying the greenery.
You’ll get around 30 minutes here, which is enough time to enjoy the atmosphere and wander a bit without feeling rushed. If you like parks that mix nature with a bit of everyday life, this stop delivers.
The flowers and trees are part of the appeal, especially if your timing includes good daylight. If the weather’s changeable, you might still get great results because the park is largely outdoors and scenic even when clouds roll in.
One practical consideration: this is a park stop, not a museum stop. If you need lots of indoor, sheltered time, plan for that mentally and bring a rain layer if you’re going in unsettled conditions.
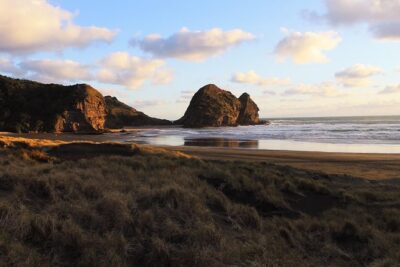
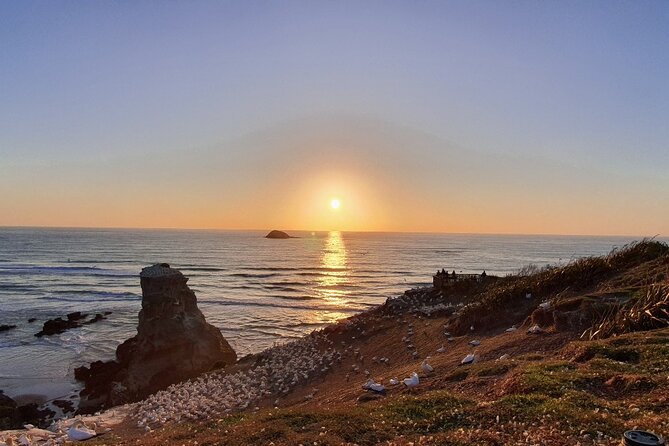
Mission Bay: beach energy and a quick bite plan (but no food is included)

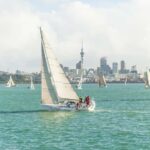
Mission Bay is one of Auckland’s best-known beach areas. It’s lively without being overwhelming, and it’s a great contrast to the volcano hill earlier in the tour.
You’ll have about 20 minutes here, which is short but workable if you’re focused. Use that time for a walk along the water edge and a look at the restaurant strips nearby, then grab a few photos with the bay view as your backdrop.
Because food and drinks aren’t included, Mission Bay is where you can make a smart choice: if you want a sit-down meal, you’ll probably need to plan it outside the tour. If you prefer snacks, buy them before or after—this stop is better for views than for a full meal.
Also, since it’s a beach area, bring footwear that handles sidewalks and uneven ground. You’ll likely do some quick steps and turns as you move toward the best view points.


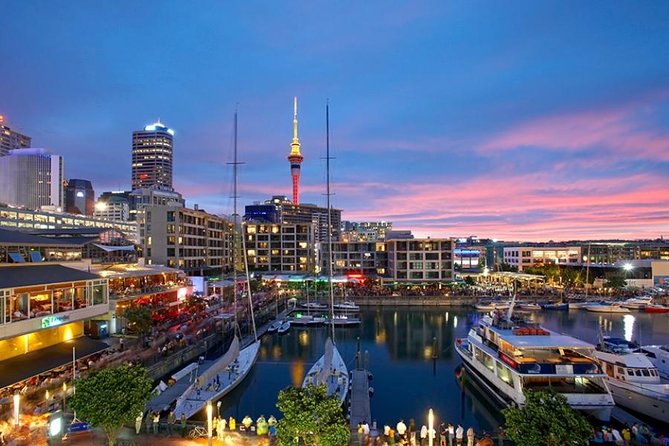
Westhaven Marina: the harbor bridge photo moment (15 minutes well spent)
Westhaven Marina is the tour’s quick “wow photo” stop. This is where you can get a classic harbor bridge shot—one of those views Auckland is famous for.
You’ll have about 15 minutes at the marina. That might sound short, but it’s enough time to get situated, take photos from a couple angles, and do a quick scenic sweep.
This stop is especially good when you want a memorable souvenir photo but don’t want to spend an hour looking for the perfect spot. If you care about getting the bridge framing right, arrive ready: phone charged, camera cleaned, and a good spot in mind before you start shooting.
In the overall pacing, Westhaven is a strong finish because it ties the city together visually—parks and beaches lead naturally into the harbor and the bridge.
The small-group pace: comfortable, but expect limited time at each stop
This tour is designed to hit several major highlights in one half-day. That’s the trade-off. Stop times are brief—so you’ll get a taste, not a long stay.
Many people love this pace because it’s efficient, and guides are repeatedly praised for keeping things moving on schedule. Names that come up in the feedback include Min, Sharma, Israel, Sung/Song, and Hong, with visitors mentioning clear communication and a friendly, safe-driving style. Some guides also take photos for you or help you figure out exactly where to stand for viewpoints.
That said, a few people felt the stops were too short. If you’re the type who likes to linger, take lots of photos, or do a slower walk, you may feel slightly rushed. A good workaround is to treat your main priorities as your “must-get” photos first, then enjoy the rest of the walk if time allows.
If weather is poor, know that the tour requires good weather. When conditions aren’t right, you may be offered another date or a full refund. That’s a key factor in Auckland, where a plan that looks great on paper can feel different under rain and wind.
Guides and comfort: what you’re paying for beyond the checklist

The headline stops are Mount Eden, Cornwall Park, Mission Bay, and Westhaven Marina. But the value is in how the day runs: vehicle comfort, timing, and guide guidance.
You’re getting a small-group experience in a private vehicle, and that changes the feel right away. You’re not squeezed into a large group setup. You’re also not playing transport roulette between distant points.
In feedback, people highlight guide style—being easy to understand, giving context along the way, and adjusting pacing to fit the group. Some also mention that guides added extra nearby sights beyond the main four stops. One visitor described an afternoon that included places like One Tree Hill, Achilles Point, and Savage Memorial Park along with the core highlights, which is a reminder that your guide may bring in a bit of variety.
If you’re traveling solo, this is another reason to like the format. A guide who thinks ahead about photos and comfortable movement can make the day feel more personal.
Price and value: is $89.98 worth it?
At $89.98 per person, the price makes the most sense if you value time savings and convenience. You’re not just paying for sightseeing—you’re paying for fuel support, round-trip private transfers, and hotel or port pickup and drop-off.
Since food and drinks aren’t included, you’ll want to budget for your own lunch or snacks. But the tour covers transportation and gets you from stop to stop without you having to manage parking or transit.
The best value angle here is for cruise passengers and first-time visitors. If you’re on a tight schedule, a guided loop with pickups can cost less in effort than trying to stitch together taxis and self-guided stops. Even for non-cruise visitors, the same logic holds: you trade a small amount of flexibility for speed and guidance.
This is also a practical option because it’s capped at five travelers. That matters. A half-day tour can feel like a tourist stampede when groups are big. Here, it’s set up to feel calmer.
Who should book this Auckland Highlights tour
I’d point you toward this tour if you fall into one of these buckets:
- You have limited time in Auckland and want a fast orientation
- You’re cruising and want stress-free port pickup and drop-off
- You like the mix: viewpoints, parks, beach views, then harbor photos
- You prefer a small group and a private vehicle over large-group chaos
- You want a guide to help connect Auckland’s geography and culture in plain terms
I’d reconsider if you’re hoping for long time at each stop, deep time in the central business district, or a full meal-focused outing. This tour is built for highlights, not for lingering.
Should you book? My take
If your goal is to get your bearings fast and see Auckland’s most iconic variety in one half-day, this tour is a solid choice. The included transfers are the big reason—especially if you’re on a cruise and don’t want to deal with getting to and from separate transport.
Book it if you can handle short stops and you’re okay with planning food separately. Avoid it if you want extended walking time or you’re hoping to spend most of your day in a single area.
If you do book, come with two priorities: your Mount Eden view photos and your Westhaven Marina harbor shot. Everything else is bonus time to enjoy Auckland’s parks and beaches without wasting the afternoon.
FAQ
How long is the Auckland Highlights tour?
It runs for about 4 hours.
What does the tour cost?
The price is $89.98 per person.
How many people are in the group?
The tour is limited to a maximum of 5 travelers per group.
Are hotel or port transfers included?
Yes. Hotel pickup and drop-off and port pickup and drop-off are included.
Where does the tour go?
The main stops are Mount Eden, Cornwall Park, Mission Bay, and Westhaven Marina.
Is admission required for the stops?
Admission ticket fees are listed as free for each of the main stops.
Does the tour include food or drinks?
No. Food and drinks are not included.
What kind of ticket do I receive?
You’ll receive a mobile ticket.
What happens if weather is poor?
The experience requires good weather. If it’s canceled due to poor weather, you’ll be offered a different date or a full refund.
Can I cancel for free, and how far in advance?
Yes, you can cancel for free up to 24 hours before the experience starts for a full refund.