REVIEW · AUCKLAND
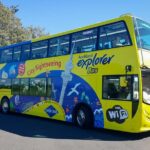
Auckland: Vintage Double-Decker Bus Sightseeing Tour
Book on GetYourGuide →Operated by Vintage Views · Bookable on GetYourGuide
A 1964 bus makes Auckland feel cinematic. This vintage Routemaster tour is a fast, panoramic hit of the city’s biggest sights, with the added wow factor of a Harbour Bridge drive from a classic double-decker. I love the old-school ride feel and the straightforward route that doesn’t waste your time with stops. The main thing to weigh is photo limits, since the bus doesn’t stop along the way.
I’m also a big fan of the onboard storytelling. The guiding style has a mix of solid explanations and an easy, joking tone, so the trip stays fun instead of turning into a lecture. One possible drawback: some versions of the narration can linger on the bus itself, including details like engine size and weight—great if you like transport trivia, less great if you want pure sightseeing.
In This Review
- Key Things I’d Remember Before Boarding
- Why This Vintage 1964 Bus Ride Feels Like More Than a Tour
- The Non-Stop Loop and the 3-Hour Reality Check
- Where You Start and How to Find 2 Customs Street East
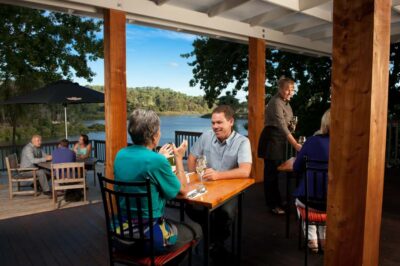
- Mission Bay: Beach Views Without the Walk
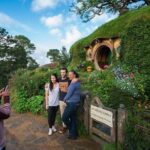
- Parnell Village: Classic Streets and “Old Auckland” Mood
- Ponsonby Road: The Neighborhood Energy in a Fast Pass
- K Road and Nightlife Vibes From the Upper Deck
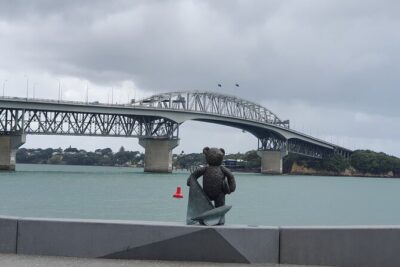
- The Harbour Bridge Crossing: The Big Visual Payoff
- Onboard Commentary: Banter, Bus Nerd Details, and Timing
- Price and Value: What $29 Gets You (and What It Doesn’t)
- Who This Tour Fits Best (and Who Should Skip It)
- Quick Practical Tips Before You Go
- Should You Book This Vintage Double-Decker Auckland Tour?
- FAQ
- How long is the sightseeing portion of the tour?
- Does the bus stop during the tour?
- Where do you meet and where does the tour end?
- What major sights does the route pass?
- How much does the tour cost?
- Is cancellation or reserving in advance available?
Key Things I’d Remember Before Boarding
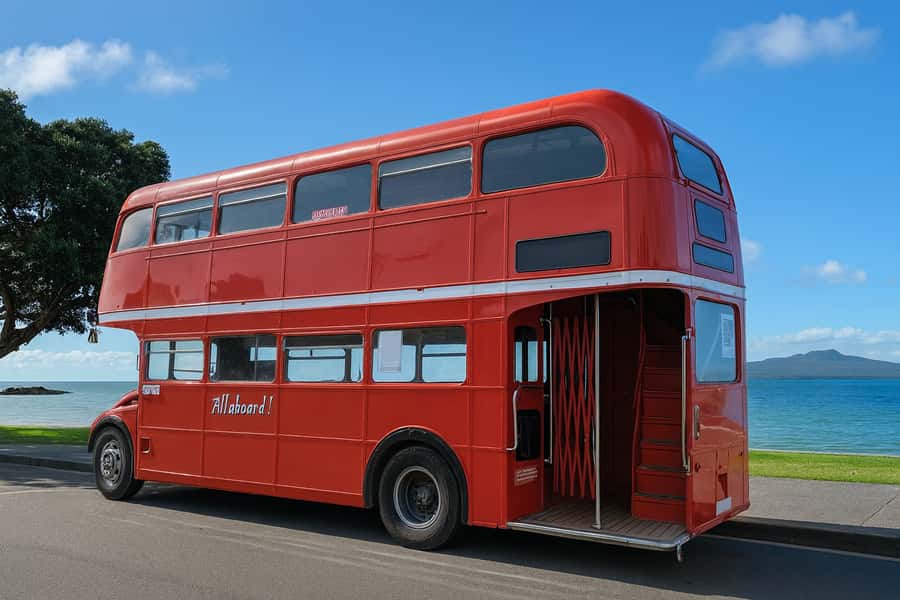
- A real 1964 Routemaster double-decker: classic design plus open-air sightseeing vibes.
- Non-stop sightseeing for 1.5 hours: you get the highlights without hunting for viewpoints.
- Auckland Harbour Bridge crossing: a quick, dramatic city view from the upper deck.
- Mission Bay, Parnell, Ponsonby, and K Road in one loop: the neighborhoods that shape Auckland’s character.
- Photo timing matters: you’ll need to shoot fast while the bus rolls by.
Why This Vintage 1964 Bus Ride Feels Like More Than a Tour
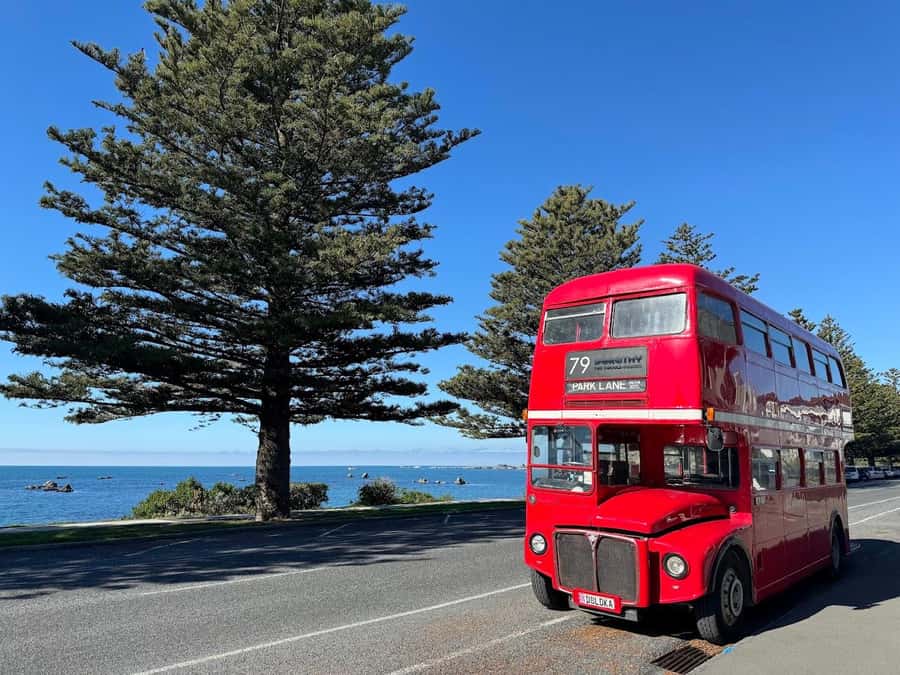
There’s something about boarding a vintage Routemaster that instantly changes the mood. Instead of looking at Auckland through a window that feels like any other bus, you get that unmistakable 1960s double-decker layout and the sense you’re riding a piece of transport history.
I also like the way the tour is built for short visits. At $29 per person for a route that covers multiple famous areas, the value comes from doing a lot in a small time window. You’re not signing up for a long excursion with lots of delays—you’re buying a clean, guided “best of” loop.
The big trade-off is simple: this is panoramic by design, not a hop-on, hop-off tour. If your priority is stopping for pictures or walking around at each spot, you’ll feel the limits.
You can also read our reviews of more tours and experiences in Auckland.


The Non-Stop Loop and the 3-Hour Reality Check
Even though the activity runs for 3 hours total, the sightseeing portion is 1.5 hours. That means you’re looking at a compact experience: board, glide through the city’s highlight belt, then finish back where you started.
The non-stop element matters more than it sounds. Without stops, the bus keeps moving through the neighborhoods, so you get a steady rhythm of views—beach, streets, city center vibes, and then the bridge moment. It also means you don’t spend your time standing around waiting for the group to reassemble.
Where this can frustrate people is obvious once you think about it: you can’t linger. If you’re the kind of traveler who wants to capture one perfect photo or spend time at a specific corner, plan to treat this as a ride-first experience.
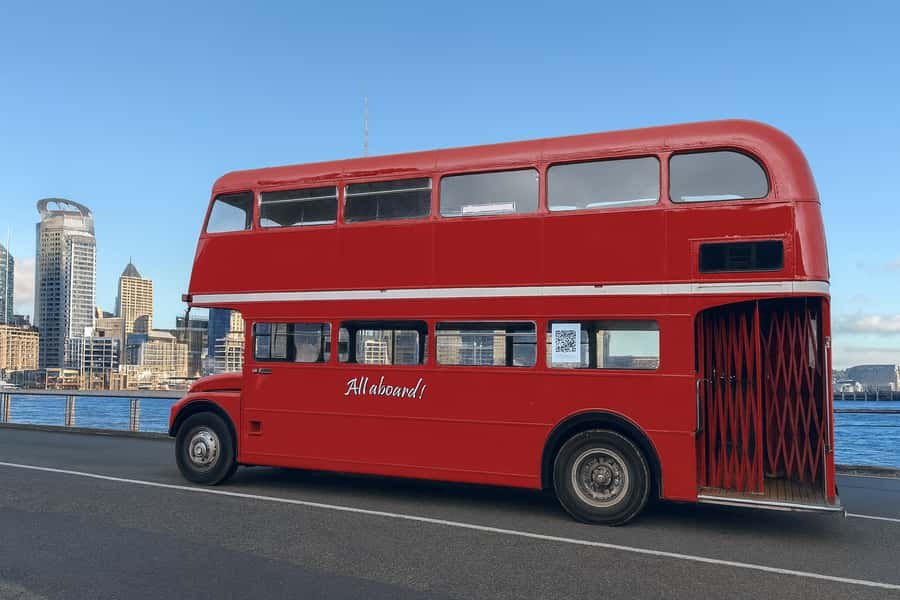
Where You Start and How to Find 2 Customs Street East

Your pickup and return point is 2 Customs Street East. That’s great because it’s central, and you’re not committing to a complicated meeting scheme across town.
One practical heads-up: the meeting point is described as being outside the Adidas shop, and at least one rider found the start area a little hard to spot because there wasn’t clear signage. So give yourself a few extra minutes and do a quick scan around the storefront before you assume you’re in the wrong spot.
If you’re traveling with kids, or you just like arriving early to avoid stress, this is the kind of tour where extra buffer really helps. Once the bus departs, you’re on the clock.
Mission Bay: Beach Views Without the Walk
Mission Bay is one of the best places in Auckland for that “coastal Auckland” feeling, and it’s included right in the ride. Since the tour doesn’t stop, you won’t get a beach stroll or a long look from a single spot. What you do get is a quick burst of coastal scenery from the bus window and especially from the upper deck.
This is where the non-stop format works in your favor. You get the geography of the city—how the coastline shapes the neighborhoods—without turning the trip into a long detour.
If you’re the type who loves beaches, treat this as a first impression. After this tour, you’ll probably want to come back later for a proper look with time to wander.
Parnell Village: Classic Streets and “Old Auckland” Mood
Parnell shows up next, and it’s the area that often signals to first-timers that Auckland isn’t only about harbors and high-rises. Parnell is known for its character-filled streets and village vibe, and on this bus loop you’ll get a sense of the neighborhood layout and architecture style as you glide through.
Because the bus doesn’t stop, your view of Parnell is mostly from the moving streetscape. That can actually be helpful if your goal is orientation—how Parnell fits into the wider city map.
The best way to enjoy this section is to watch the transitions: from coastal Mission Bay into more historic, neighborhood-scale Auckland. You’ll come out with a clearer sense of where you might want to spend time later on foot.


Ponsonby Road: The Neighborhood Energy in a Fast Pass
Ponsonby is where Auckland starts to feel more like a lived-in city neighborhood. On this route, you’ll travel through Ponsonby Road, which is a useful shorthand for a whole cluster of bars, dining, and street life.
Again, you’re not stopping to browse storefronts. But you’re doing something practical: you’re connecting a famous name (Ponsonby) to what it looks like in motion, including the street rhythm and density that photos alone can’t fully explain.
If you’re thinking ahead about your itinerary, this is a smart way to decide your next move. When you return to Auckland later, you’ll have a stronger instinct for whether you want a daytime explore, an evening walk, or a meal in the area.
K Road and Nightlife Vibes From the Upper Deck
K Road is included on the tour, and it’s a great match for the double-decker format. Even without stops, you can still catch the feel of K Road as a nightlife-focused strip, with the street going by fast enough to keep the ride lively and interesting.
This section is also a reminder that Auckland’s “best of” doesn’t just mean scenic. It also means understanding the city’s social pulse.
A practical tip: if nighttime matters for your trip, this is where the tour gives you a starting point—even if you’re riding in daylight. You’ll remember the general corridor when you’re later deciding what to do after dinner.
The Harbour Bridge Crossing: The Big Visual Payoff
The most dramatic moment is the drive across the Auckland Harbour Bridge. The bridge is the kind of landmark you don’t need a long explanation for—you just want the view, and you want it from the right angle.
From a double-decker, this is where you can see why the tour is built around panoramas. You get wide city views and the sense of how the harbor cuts the city in half. Even if you’ve seen pictures, moving over the span gives you a better sense of scale and layout.
This is also a good moment for photos, but don’t expect stop-and-shoot freedom. Think of it as a quick photo window: hold your phone steady, switch to burst mode if you use one, and be ready when the bridge lines up.
Onboard Commentary: Banter, Bus Nerd Details, and Timing
The onboard experience is half the product. One standout theme is that the guide’s delivery can be entertaining, with banter that keeps the atmosphere friendly and group energy up.
At the same time, there’s a clear style note to consider. Some guides spend extra time on vintage bus specifics—things like engine size and other technical details. If you love vehicle history, that’s fun. If you’d rather get straight to city sights, you might find that stretch a little long.
Either way, the commentary is designed to give you context while you watch the neighborhoods roll by. It’s one of the reasons this isn’t just an inexpensive ride—it’s a guided way to process what you’re seeing.
Price and Value: What $29 Gets You (and What It Doesn’t)
At $29 per person, this tour is priced like an efficient “orientation” option. You’re not paying for multiple stops, long walking blocks, or a full-day route.
Instead, you’re paying for:
- a classic 1964 Routemaster ride experience
- guided narration during a focused 1.5-hour loop
- a highlight route that covers Mission Bay, Parnell, Ponsonby, and K Road
- a memorable landmark drive across the Harbour Bridge
What you’re not paying for is time to wander at each neighborhood. So if your ideal city tour includes frequent stops and photo opportunities on demand, you may end up frustrated.
But if your goal is to get your bearings fast and learn what to prioritize later, the price-to-time ratio makes sense.
Who This Tour Fits Best (and Who Should Skip It)
This is a strong fit for:
- first-time visitors who want a fast overview
- couples who prefer low-effort sightseeing
- families who want a contained outing without long walks
- anyone who loves buses, vintage design, or transport history
You might reconsider if:
- you need frequent stops for photos
- you want to enter shops, walk streets, or spend time at each neighborhood
- you get annoyed when narration spends too much time on technical details rather than sightseeing
It’s not a bad tour for picky travelers—it’s just a different style. Treat it like a moving city “highlight reel,” not a set of timed mini-excursions.
Quick Practical Tips Before You Go
To make this ride work for you, plan like a non-stop tour is exactly what it is.
- Bring something you can hold securely for photos. Since the bus doesn’t stop, you’ll be shooting from motion.
- If you care about photos, aim to capture the bridge and main neighborhood stretches first.
- Wear comfortable shoes anyway. Even though you won’t be doing long walks, you’ll still benefit from being ready if you want to stretch after the tour.
- Arrive a few minutes early at 2 Customs Street East. The pickup point being near the Adidas shop can be easy to miss if you’re rushing.
Should You Book This Vintage Double-Decker Auckland Tour?
I’d book it if you want Auckland in one focused guided sweep. The combination of a vintage 1964 Routemaster, a Harbour Bridge crossing, and a highlight route through Mission Bay, Parnell, Ponsonby, and K Road hits a sweet spot—especially when you’re short on time.
Skip it if you’re chasing lots of stops, long photo pauses, or walking visits. This tour is built for seeing from the road, not for hanging out at every neighborhood.
FAQ
How long is the sightseeing portion of the tour?
The sightseeing tour lasts 1.5 hours. The overall activity duration is listed as 3 hours.
Does the bus stop during the tour?
No. It’s described as a seamless panoramic journey with no stops.
Where do you meet and where does the tour end?
Pickup and return are at 2 Customs Street East.
What major sights does the route pass?
The route passes Mission Bay, Parnell (including Parnell Village), Ponsonby (including Ponsonby Road), and K Road, plus a drive across the Auckland Harbour Bridge.
How much does the tour cost?
The price is $29 per person.
Is cancellation or reserving in advance available?
Yes. The activity lists free cancellation up to 24 hours in advance for a full refund, and it also offers reserve now & pay later.