REVIEW · AUCKLAND
Auckland Museum and Highlight Sightseeing Tour
Book on Viator →Operated by Kowi Tour · Bookable on Viator
Four hours, four iconic Auckland stops. This small-group sightseeing plan strings together the Harbour Bridge, Mt Eden, Auckland Museum, and the Winter Gardens in a way that feels efficient but not rushed.
I especially like two things here: Auckland Museum admission is included, so you don’t waste time figuring out tickets on the day. And the guide, Sam, focuses on making it easy to capture the day—taking plenty of photos/videos and sending them along after.
One heads-up: there’s a fair amount of walking, especially around Mt Eden, so plan on moderate fitness and comfy shoes.
In This Review
- Key points to know before you go
- Why this Auckland highlights tour feels worth your time
- Hilton Auckland pickup and a smooth start (no wandering required)
- Stop 1: Auckland Harbour Bridge in 20 minutes of photo-ready city energy
- Stop 2: Maungawhau / Mount Eden for crater views and cultural context
- Stop 3: Auckland Museum in the Auckland Domain (with admission handled)
- Stop 4: Winter Gardens in Auckland Domain for a calmer finish
- Price and value: what $111.70 really buys you
- What the guide experience adds (and how to take advantage of it)
- Timing, walking, and what to bring
- Should you book this Auckland Museum and highlights tour?
Key points to know before you go
- Semi-private group (max 8) means more time at viewpoints and easier photo stops
- Mt Eden (Maungawhau) is the star for wide-open, lookout-style views
- Auckland Museum entry included keeps your day simple and structured
- Auckland Domain + Winter Gardens give you a break after the viewpoints
- Pickup offered from a central hotel makes starting easier
- Sam’s photo help can save you time and gets you better angles
Why this Auckland highlights tour feels worth your time
This is the kind of Auckland day that works even if you don’t want to plan. You’ll cover several headline spots in about four hours, using an air-conditioned vehicle for the moves between viewpoints. The magic is the pacing: short photo-friendly stops outside, then proper time inside Auckland Museum, then a calmer garden finale.
What makes it feel especially practical is the mix of three themes that visitors often chase separately: city views, Maungawhau/Mt Eden volcanic scenery and culture, and Auckland Domain history with museum time. Instead of forcing long, separate outings, you get a tidy route that still feels like you’re actually seeing the city—not just driving past it.
Also, there’s a nice human factor. The guiding style described here is friendly and interactive, with Sam taking time to help you with pictures and videos. That matters because Auckland’s best moments are often the quick ones: the view arriving exactly when the light is right, the crater-looking angle at Mt Eden, or the framing you want before you hop back in the car.
You can also read our reviews of more museum experiences in Auckland


Hilton Auckland pickup and a smooth start (no wandering required)
The meeting point is Hilton Auckland, 147 Quay Street, in Auckland Central. The tour also ends back at the same meeting point, which is a small thing that saves stress. You don’t have to figure out transit back, or worry that you’ll be dropped somewhere less convenient.
Pickup is offered, and there’s also a mobile ticket. That combo usually means fewer logistics headaches on arrival day—just check in, get oriented, and go.
One more practical detail: the group is capped at 8 travelers. That’s small enough that you’re not stuck watching your guide talk from the back row, but big enough that you still get the energy of a shared outing. If you like asking questions and getting a real answer at the spot you’re standing on, this size helps.
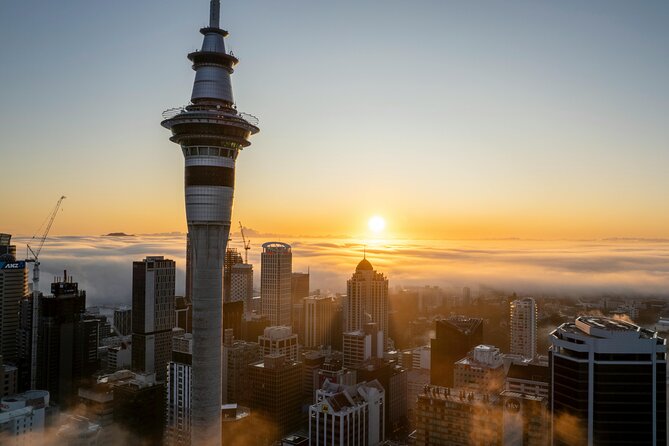
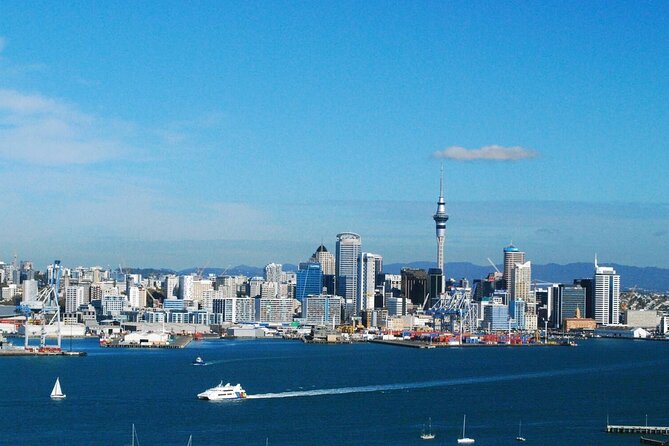
Stop 1: Auckland Harbour Bridge in 20 minutes of photo-ready city energy
Your first stop is Auckland Harbour Bridge, spanning the Waitematā Harbour and connecting the central business district (CBD) with the North Shore. It’s a classic Auckland “right now, you’re here” landmark.
At 20 minutes, this is clearly a viewpoint-and-photo stop, not a long stay. That works well because the bridge is best appreciated in a quick window—wide enough angles, easy framing, and a sense of how Auckland stretches around the water. If you like snapping photos with the city and harbour in one frame, this is your moment.
The drawback? If you’re the type who wants to linger for half an hour+ just to soak in the view, you’ll probably wish this were longer. But the trade-off is you’ll move on to the spots that need longer stops—Mt Eden and the museum.
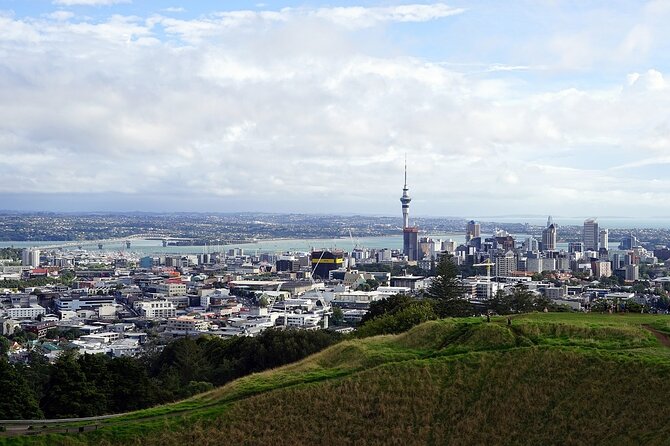
Stop 2: Maungawhau / Mount Eden for crater views and cultural context
Next is Maungawhau / Mount Eden. It’s described as a prominent volcanic peak and a suburb, and it’s also a cultural landmark with Māori significance. You get about an hour, which is a good amount of time to walk, look around, and still have energy left for the museum after.
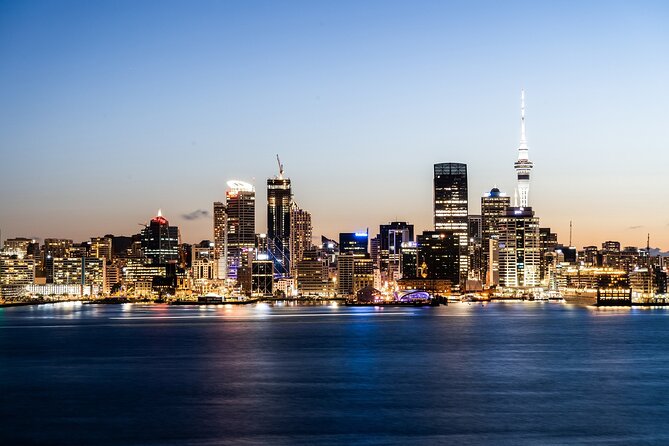
This stop is one of the most praised moments of the day—specifically because of the wide view. From here, you can get that “how big is the city really?” feeling. One highlight in the feedback was the 360-degree-style views, and that tracks with why Mt Eden is so popular: it’s naturally positioned for seeing Auckland spread out in multiple directions.
What to watch for:
- You’ll be on foot, so bring comfortable shoes and expect some uneven ground.
- Plan your photos early. Views can change with lighting, and an hour disappears fast when you’re constantly repositioning for the best angle.
Also, if you appreciate context, the guide’s role matters at Mt Eden. It’s not just a lookout; it’s also tied to Māori place knowledge (the name Maungawhau is part of that). A good guide helps you connect what you’re seeing with what it means.
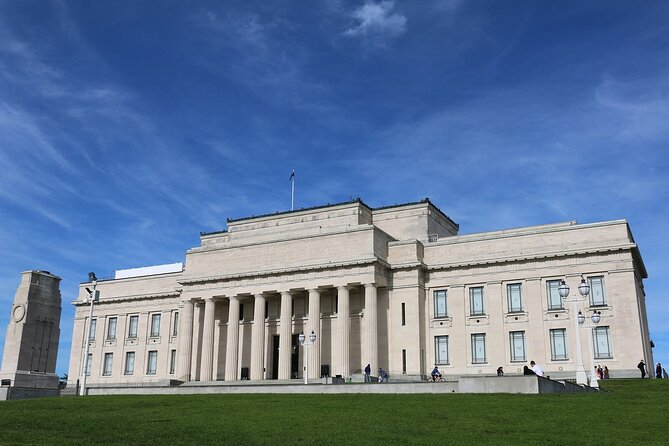
Stop 3: Auckland Museum in the Auckland Domain (with admission handled)

Then it’s Auckland Museum, specifically the Auckland War Memorial Museum area in the heart of the Auckland Domain. You’ll have about 1.5 hours, and museum admission is included.
This stop is the “slow down” part of the tour. Outside, you’re chasing views and angles. Inside, you can actually absorb stories—especially the Māori heritage themes and the deeper cultural and historical framing that the museum is known for as one of New Zealand’s important institutions.
A practical reason this museum stop is worth it: you don’t have to do ticket math at the counter or worry about whether you’re allowed into the general areas you came for. Your general entrance fees are included, and you have a defined chunk of time.
Potential drawback: 1.5 hours can feel short if you love museums. But for many visitors, it’s the right amount. You’ll get a solid taste of the museum’s themes and you won’t end the day exhausted.


Stop 4: Winter Gardens in Auckland Domain for a calmer finish
Your last stop is the Winter Garden Auckland Domain. It’s in the Auckland Domain, described as the city’s oldest park, and the Wintergardens themselves are historically significant and beautiful.
You’ll spend about 30 minutes, which is a smart cap on the day. It gives you a change of pace after viewpoints and museum time. It’s also a great moment to reset your feet and take photos that don’t look like typical “standing at a lookout” pictures.
This is especially useful if your main motivation is balanced sightseeing. The earlier stops are about big perspectives—harbour lines and city expansion. Here, you get something gentler: garden detail, shade, and a quieter atmosphere.
The only downside of a half-hour is that it’s easy to feel like you want more time if you enjoy garden wandering. Still, the pacing works for the overall four-hour structure.
Price and value: what $111.70 really buys you
The price is $111.70 per person. With that number, it’s easy to ask: am I paying for the sights, or paying for the convenience?
In this case, you’re paying for convenience plus access:
- Air-conditioned vehicle for moving around
- Guide and driver (and the guide’s photo help is a real value here)
- Fuel surcharge
- GST
- Parking fees
- Auckland Museum general entrance fees
What’s not included is also clearly spelled out: food and drinks, plus tips NZ$20.00 per booking.
If you compare this to DIY, you’d still need transport between central viewpoints and you’d likely hit parking costs plus museum admission. You’d also spend time organizing your route and timing. This tour bundles those friction points into one plan. That’s why a small group tour like this can be good value even if you’re not trying to “optimize costs.”
One more point: tours like this often sell faster than you expect. This one averages 50 days booked in advance, so if Mt Eden and the museum are must-dos, it’s smart to lock it in early.
What the guide experience adds (and how to take advantage of it)
The guide is a big part of the payoff. Sam comes through in the feedback as personable, friendly, and careful about keeping people safe and entertained. He’s also described as actively helping with photos and videos, and even sending them after.
That’s practical travel magic. Most people don’t mind taking their own pictures. What they struggle with is getting clean angles quickly, especially at viewpoint spots where everyone’s trying to line up. When your guide is taking shots for you, you can focus on enjoying the view instead of juggling a phone, a tripod-less hand, and a crowd.
If you want to maximize this benefit:
- Arrive ready to move. When you see a good angle, pause for a few shots and then get comfortable.
- Ask for picture positioning early, not at the last minute.
- If you have a specific photo goal (bridge with harbour, Mt Eden overview direction), tell Sam when you start that stop.
There was also mention of a strong dinner recommendation from the guide. That’s a simple extra that can upgrade your evening plans without extra searching.
Timing, walking, and what to bring
This is a 4-hour tour, and the stops add up to a busy-but-manageable day: 20 minutes at the Harbour Bridge, 1 hour at Mt Eden, 1.5 hours at Auckland Museum, and 30 minutes in the Winter Gardens. The rest is transport time and moving between spots.
Walking reality check: the tour should work for people with moderate physical fitness, but it’s not a sit-and-watch all day plan. Mt Eden in particular involves time on foot, so pack like you’ll be walking. Comfortable shoes are the main item, because your feet will feel it.
Bring:
- A camera or phone charger if you’re shooting a lot
- Water (since food and drinks aren’t included)
- Light layers if the weather shifts
And a tip that’s worth repeating: plan your food timing. With the tour finishing back at the meeting point, you’ll likely want dinner soon after. Since the guide can offer a recommendation, you can use the time to figure out where you want to go.
Should you book this Auckland Museum and highlights tour?
Book it if you want an efficient Auckland sampler that still covers the big emotional hits: harbour icons, Mt Eden’s sweeping views, and real museum time in the Auckland Domain. It’s a strong choice for first-timers who don’t want to piece together transport and ticket stops.
Skip it or consider a different option if you:
- hate walking or aren’t comfortable with uneven outdoor terrain
- want a long, slow museum experience (1.5 hours is solid, but not endless)
- can’t do without food planned in advance (you’ll need to handle drinks/snacks yourself)
My take: this is a good-value tour for what’s included, and the guide help—especially Sam’s photo/video support—turns the day from standard sightseeing into something you’ll actually remember (and share) without fighting your camera at every stop.