REVIEW · AUCKLAND
Auckland to Rotorua, Hobbiton and Waitomo 1 Way Small Group Tour
Book on Viator →Operated by Cheeky Kiwi Travel · Bookable on Viator
Two movie worlds in one long day. This one-way Auckland to Rotorua tour strings together Hobbiton Movie Set and Waitomo Glowworm Caves with local guiding, so the stops feel connected instead of random. I especially like the small-group size (max 15) and the way the guide adds real-world New Zealand context during the long day.
The trade-off is time: you’re on the road for about 13 hours starting at 6:00 am, and Rotorua only gets a quick highlights drive before you’re dropped for check-in.
In This Review
- Key points to know before you go
- A one-way day that links Hobbiton and Waitomo smoothly
- The early start and small-group rhythm (and how to plan for it)
- Auckland-to-Rotorua drive: Waikato farms, rivers, and photo moments
- Waitomo Glowworm Caves: formations first, then the glow
- Hobbiton Movie Set: bus ride, lunch time, and the guided 2.5 hours
- Rotorua highlights drive: quick orientation so you can check in fast
- Price and value: what $266.23 covers on a one-way, ticket-heavy route
- Who this tour suits best (and who may want to adjust)
- Should you book this Auckland to Rotorua Hobbiton and Waitomo tour?
- FAQ
- What time does the tour start?
- How long is the tour?
- Is this tour one-way or round-trip?
- What are the main attractions included?
- Do I need to arrange transportation between cities?
- How big is the group?
- What luggage is included?
- Are there refreshments provided?
- What’s the cancellation policy?
- Are there any child or fitness requirements?
Key points to know before you go
- Max 15 travelers keeps the day feeling friendly, not chaotic
- Waitomo Glowworm Caves plus classic cave formations on a guided visit
- Hobbiton’s full guided run after a bus ride, with time to grab lunch first
- Complimentary drink at the Hobbiton pub, a nice touch in a packed schedule
- Luggage space included (1 large + 1 small per person) for an easy one-way transfer
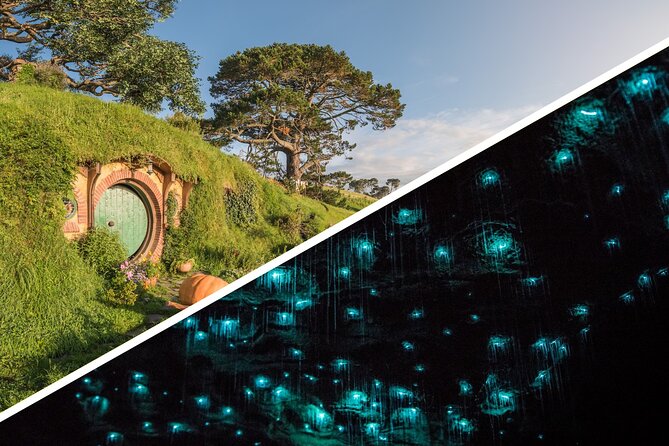
A one-way day that links Hobbiton and Waitomo smoothly
This is the kind of tour I think works best when you want big-name New Zealand sights without the stress of juggling rental cars, timing, and separate ticket lines. The format is simple: you start in Auckland, hit Waitomo first, then go to Hobbiton, and finally finish in Rotorua with a short orientation drive.
What makes it stand out in practice is the order. Waiting until after the caves to reach Hobbiton helps break up the day: caves are darker, quieter, and slower. Then you pop into the colorful, storybook world of the Shire, where you get a proper guided tour and time to plan your lunch.
I also like that this is a one-way transfer. You’re not ending where you started. Instead, you finish in Rotorua so you can check in and continue your trip without backtracking.
The guiding matters too. The best moments on tours like this aren’t just seeing the sites—it’s the extra context that turns them from movie sets into places with real geography and local stories. That’s the vibe you’re paying for here.
You can also read our reviews of more tours and experiences in Auckland.

The early start and small-group rhythm (and how to plan for it)
You’re picked up in Auckland and the day kicks off at 6:00 am. That’s early enough that you’ll want to treat the night before like a travel day: set out clothes, charge devices, and don’t plan anything intense late in the evening.
The good news: with a max group size of 15, the pacing tends to feel more human. You’re not constantly waiting for a crowd. Your guide can keep the day moving, while still giving you time to understand where you are and what to look for.
The total time is about 13 hours. That’s a long day, even with included tickets and pickup/drop-off. You’ll want to pack for comfort: water and snacks are included, but you still benefit from a warm layer. Caves can feel cooler than you expect, and Rotorua mornings and drives can be chilly.
One more practical note: this tour requires a moderate physical fitness level. That doesn’t mean you need to be an athlete, but you should be comfortable with some walking and time spent inside cave areas.
If you’re the type who gets grumpy when a schedule is tight, this might feel rushed. But if you like structured days—where someone else handles the driving and entry tickets—it’s a strong setup.
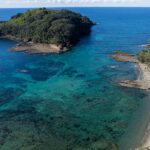
Auckland-to-Rotorua drive: Waikato farms, rivers, and photo moments
Between Auckland and Rotorua, the tour uses the long highway time to show you the wider region. You head south through the Waikato countryside, which is New Zealand’s big farming engine. The route includes rivers and mountain views, and it’s set up for photo stops rather than strict door-to-door speed.
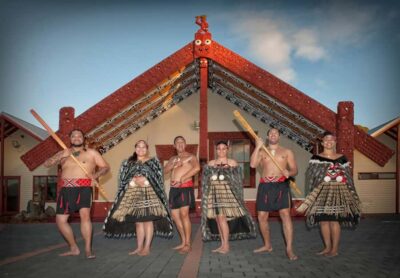
This is where you can get your bearings for the trip ahead. Rotorua isn’t just geothermal steam and lakes—it sits in a whole landscape shaped by volcanic activity and nearby landforms. Seeing the countryside transition on the drive helps the Rotorua stops make more sense.
There’s also a fun cultural roadside touch on the way: you pass through Tirau, sometimes called the Corrugated Iron Capital of the World because of the corrugated iron sculptures and buildings. Even if you only spot a few from the road, it’s the kind of quirky stop that makes the drive feel like part of the tour, not just transit.
Time matters on a day like this. Your guide is using the travel blocks for interpretation and views, and the itinerary keeps you from having to do extra planning once you arrive at each attraction. That’s real value when you’re trying to fit two major ticket sites into one day.
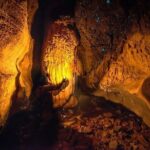
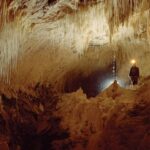
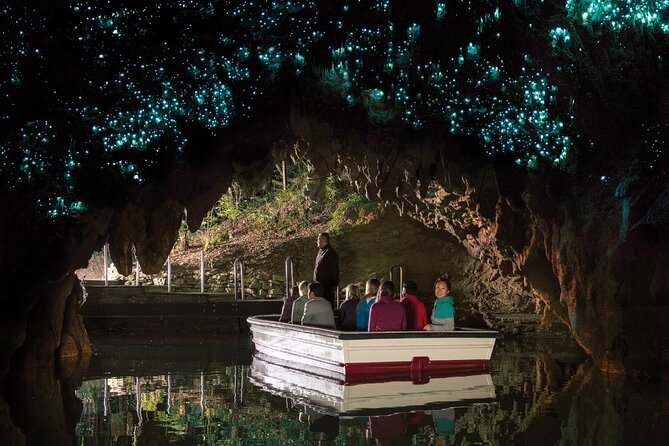
Waitomo Glowworm Caves: formations first, then the glow
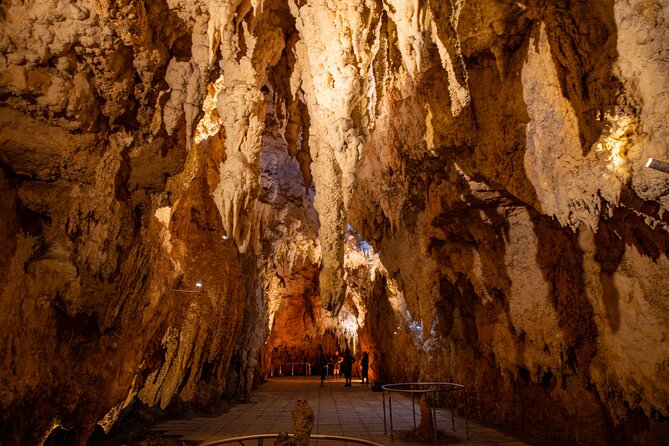
Waitomo is the first major attraction on the day, and it’s one of those places where guided time actually helps. You’ll enter the cave system as part of a guided visit and see cave formations such as stalactites, stalagmites, and lime columns.
That matters because it’s easy to look at caves like they’re just random rocks. With a guide, you start noticing patterns—what grows where, and why the cave looks the way it does. Even if you’ve seen photos before, you’ll get a better read when someone points out what you’re looking at.
The tour timing gives you about 1 hour at this first feature stop (with admission included). That’s not a long cave day. It’s designed for a tight overall schedule, so expect a focused visit rather than a slow, wandering experience.
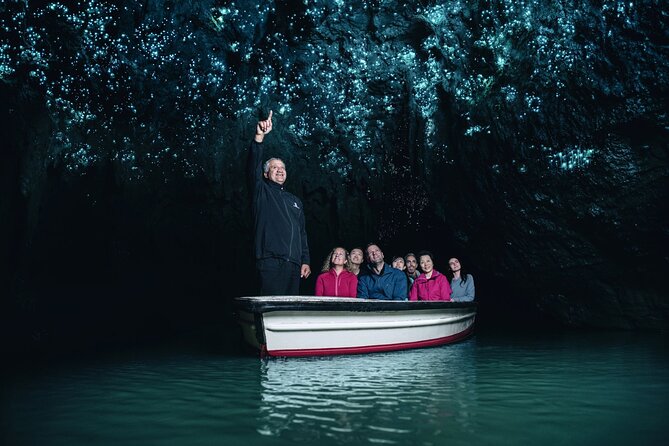
A small heads-up: Waitomo is popular. Even if the caves themselves feel special and different from the outside world, you should still plan for a visitor environment. The glowworm caves work best when you’re ready to look, listen, and follow along rather than expect total silence and empty paths.
If you’re photo-inclined, caves reward patience. Keep your camera ready, but don’t burn through battery. Dark interiors can be tricky, and you’ll get more usable shots by staying steady and taking a few well-timed frames rather than firing constantly.
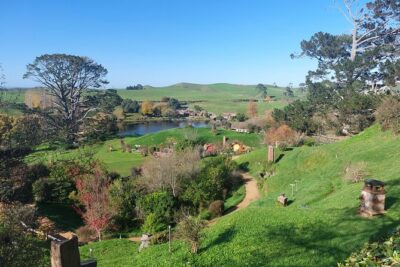
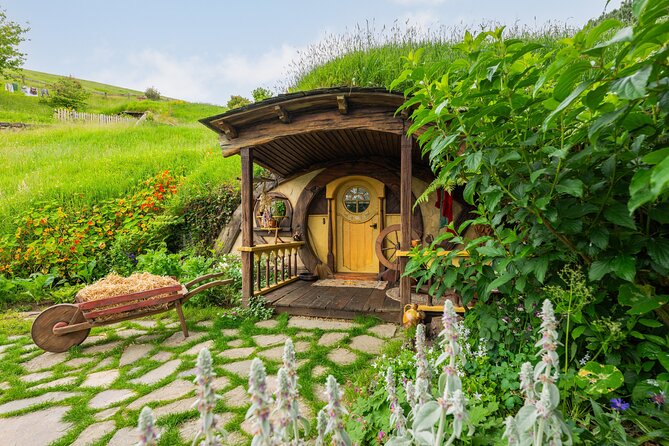
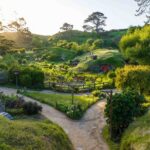
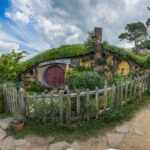
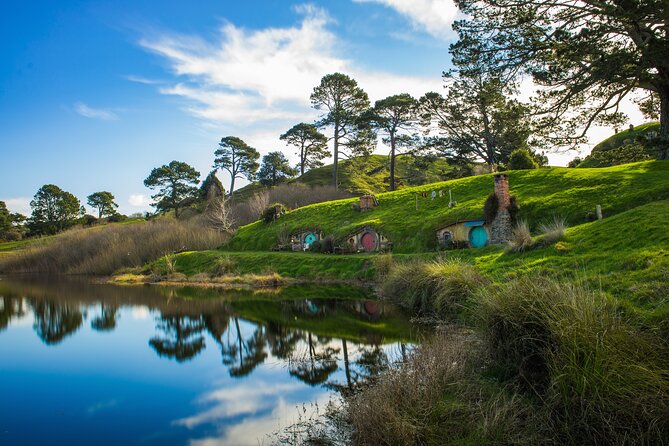
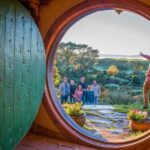
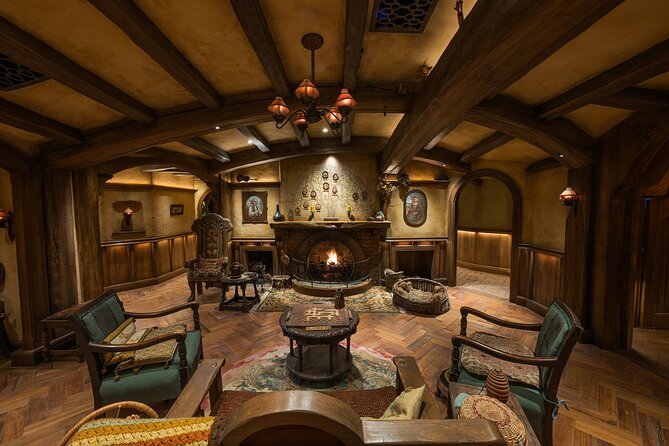
Hobbiton Movie Set: bus ride, lunch time, and the guided 2.5 hours
After Waitomo, the day shifts to a different pace: bright scenery, themed paths, and a guided tour designed for first-time visitors.
You arrive at Hobbiton Movie Set, and there’s time to buy lunch before you get on one of the big green Hobbiton buses. That’s smart scheduling. It prevents the classic problem where you arrive hungry, rushed, and then spend lunch time looking for food instead of enjoying the day.
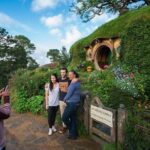
Then you board the buses and take a fully guided tour for about 2.5 hours. This is the heart of Hobbiton on this itinerary. The guide-led format is the key: you’re not just looking at sets. You’re walking through a storyline, with someone explaining what you’re seeing and how the set was built for the films.
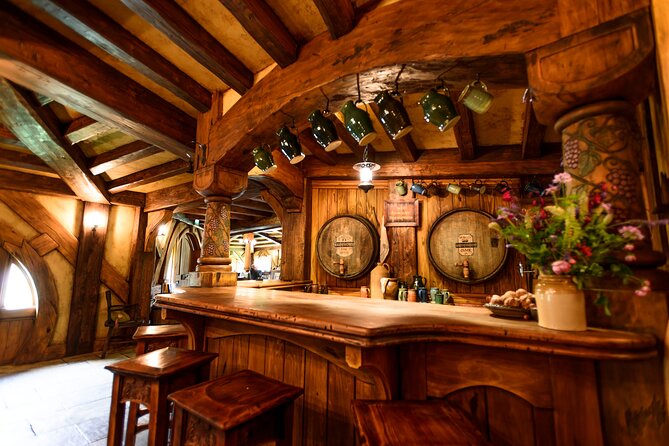
One extra perk in the mix: you’ll enjoy a complimentary beverage at the Hobbiton pub. It’s a small thing, but it helps break the day up and gives you a proper reset after travel and cave time.
What I’d keep in mind: Hobbiton is extremely visual. If you want photos, you’ll want to stay close enough to your group for the guided beats, but step to the side when you can for cleaner shots. Don’t treat it like a quick walk-through. Plan to slow down for the best views and the details that make the place feel real.


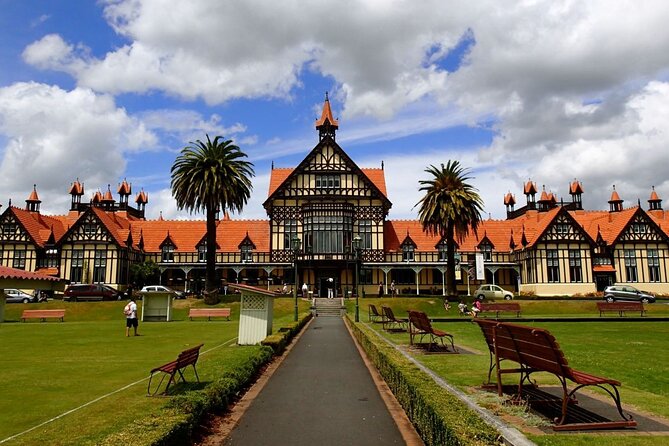
Rotorua highlights drive: quick orientation so you can check in fast
Rotorua is where the tour lands you—after the main attractions, you get a short 20-minute guided driving tour of key spots in the city.
You’ll see well-known highlights such as Lake Rotorua, the Rotorua Museum, and Government Gardens. This isn’t meant to replace exploring Rotorua on your own later. It’s a “get your bearings fast” pass that helps you understand where you are and what might be worth prioritizing tomorrow.
Because you’re finishing in Rotorua instead of returning to Auckland, this ending is built for real trip planning. Once you’re dropped at central Rotorua locations, you can check in and then decide how to spend the rest of your time—whether that means more lake views, geothermal areas, or just relaxing after a long day.
That timing is part of the value. If you’re traveling from Auckland to Rotorua anyway, this tour gives you two major attractions plus orientation without adding extra transportation days.
Price and value: what $266.23 covers on a one-way, ticket-heavy route
At $266.23 per person, this is a ticket-and-guiding package day, not a budget transfer. So the real question is what you’re getting for the price.
You’re covered for:
- hotel pickup in Auckland (at listed locations)
- hotel drop-off in Rotorua (central locations)
- admission fees for both Hobbiton and Waitomo
- bottled water and snacks
- luggage space for 1 large and 1 small per person
On a practical level, those inclusions can make the day feel cheaper than it looks. Two major attractions with guided time and entry fees would be expensive even before you factor in transportation and a guide for the driving and transitions.
Also, the tour is designed for a one-way plan. You’re not paying for a round-trip. You’re paying for a day that finishes where you want to be staying.
My balanced take: it’s great value if you want to see both Hobbiton and Waitomo and you’d rather not handle driving logistics. If you’re an independent traveler with a car and your own timing, you might be able to arrange it cheaper on your own—but you’ll be doing more coordination, and you’ll lose the guide-led context that makes the day more than just a checklist.
Who this tour suits best (and who may want to adjust)
This tour is a strong fit if you:
- want one guided day that hits both iconic stops
- don’t want to rent a car for the Auckland-to-Rotorua leg
- like small groups and clear scheduling
- want a local guide to connect the dots between places
It may be less ideal if you need a slower pace. Between the early start, cave visit, long guided tour at Hobbiton, and then a Rotorua orientation drive, you won’t have a lot of downtime.
Families should note the child car seat rule. Children aged 7 and below need a child safety car seat. The tour says you can hire seats for $20 NZD per seat, or you can bring your own.
If you’re traveling with lots of bags, check the luggage promise upfront: the tour includes space for one large and one small item per person. That’s helpful for people doing a one-way transfer, but it won’t cover unlimited extra suitcases.
Should you book this Auckland to Rotorua Hobbiton and Waitomo tour?
If you’re choosing between doing Hobbiton and Waitomo in separate days, or you’re considering the hassle of driving and organizing tickets, I think this tour is an easy yes. It packs two of the biggest regional icons into a single guided day and ends in Rotorua—so you start enjoying your next base right away.
Book it if you care about:
- guided cave and movie-set context, not just photo time
- a small-group pace
- an orderly one-way travel day with tickets handled
I’d pause and rethink if you hate early starts or you want lots of free time to roam. The schedule is full, and the Rotorua portion is intentionally brief.
If you want a straightforward, high-effort day that trades flexibility for convenience, this is the kind of tour that saves you stress and turns travel time into part of the experience.
FAQ
What time does the tour start?
The tour start time is 6:00 am.
How long is the tour?
The duration is approximately 13 hours.
Is this tour one-way or round-trip?
It’s one-way from Auckland to Rotorua.
What are the main attractions included?
It includes admission to the Hobbiton Movie Set and the Waitomo Glowworm Caves.
Do I need to arrange transportation between cities?
Pickup is offered in Auckland, and you’re dropped off in central Rotorua. The tour handles the driving.
How big is the group?
The tour has a maximum of 15 travelers.
What luggage is included?
The tour includes space for 1 large and 1 small item per person.
Are there refreshments provided?
Bottled water and snacks are included, and there’s also a complimentary beverage at the Hobbiton pub.
What’s the cancellation policy?
You can cancel for a full refund up to 24 hours in advance of the experience start time. Free cancellation is available within that window.
Are there any child or fitness requirements?
Children aged 7 and below need a child safety car seat (you can hire one for $20 NZD per seat or bring your own). The tour also notes a moderate physical fitness level is required.