REVIEW · AUCKLAND
Auckland Coastal Experience – Small Group City & Beach Tour Incl. Wine Tasting
Book on Viator →Operated by ExperienceKart · Bookable on Viator
Auckland feels like a drive, not a chore. This small-group Auckland coast-to-coast day wraps big harbor views, beach time, and a wine tasting stop into one tidy schedule. You start in the CBD and end there too, so you’re not spending your trip figuring out routes and parking.
My favorite parts are the photo chances in multiple “wow” spots and the fact you get guided wine tastings at two vineyards. I also like that the day moves at a human pace: short stops, plenty of viewing time, and a comfy minibus with water and refreshments onboard.
One thing to consider: the Muriwai gannet colony walk is seasonal and can be suspended, so you should treat that add-on as not guaranteed. Also, even though walking is described as short and optional, you’ll still want decent footwear for sand and coastal viewpoints.
In This Review
- Key Highlights You’ll Actually Feel During the Day
- Auckland in One Long Day: How This Route Really Works
- Pickup, Comfort, and the 8:00 a.m. Start
- Harbor Bridge to Westhaven: Your First Big Look at Auckland
- Kohimarama, Mission Bay, and Tamaki Drive: Beach Time Without the Setup
- Bastion Point and Achilles Point: Skyline Photos with Real Stories
- Auckland Domain and Its Quiet Detour
- Devonport on the North Shore: 360-degree Views Back to the City
- Two Vineyards, Two Tastings: Westbrook Winery and Soljans Estate
- Muriwai Black Sand Beach and Gannets: A Wild-Coast Moment with a Twist
- Price and Value: Why $232.71 Can Make Sense
- Who Should Book This (and Who Might Feel Frustrated)
- Should You Book This Auckland Coastal Experience?
- FAQ
- How long is the Auckland Coastal Experience tour?
- What does the tour cost per person?
- Do you get hotel pickup and drop-off?
- Is this a small group?
- What’s included in the tour price?
- How does the wine tasting work?
- Will I see the Muriwai gannets?
- What should I wear or bring?
- What happens if the weather is poor?
Key Highlights You’ll Actually Feel During the Day
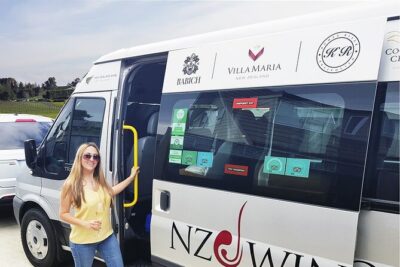
- Small-group pacing (max 16) with a temperature-controlled minibus and on-board water
- Coast-to-coast viewpoints from Auckland Harbour Bridge-area waterfront to Hauraki Gulf outlooks
- Photo stops that make sense at Bastion Point and Achilles Point for skyline and harbor angles
- Two included guided wine tastings at Westbrook Winery and Soljans Estate Winery
- Muriwai black sand beach time plus a seasonal gannet walk that may be suspended
- On-board high-speed internet so you can post photos immediately (or just stay sane)
Auckland in One Long Day: How This Route Really Works
Auckland can feel spread out, with water everywhere and neighborhoods stacked above each other like stairs. This tour is built for that reality. You get a coast-to-coast sweep in one day, with repeated viewpoint stops rather than one long sightseeing stretch that leaves you tired and cranky.
What makes it work is the mix of short scenic stops and a couple of longer “stay and look” segments. You’re not trying to see everything by yourself. Instead, you’re letting the guide do the driving while you focus on the views, photos, and that one major beach moment at Muriwai.
The route also plays to Auckland’s geography: the city sits around the Waitematā Harbour and out toward the Hauraki Gulf, then swings west to the Tasman Sea side for dramatic coastline. If you like your travel days to feel efficient without feeling rushed, this is the kind of day you’ll appreciate.
You can also read our reviews of more food & drink experiences in Auckland


Pickup, Comfort, and the 8:00 a.m. Start

The day begins at 8:00 a.m. from the Mövenpick Hotel Auckland on Customs Street East (Auckland Central). Pickup is offered from most locations in the Auckland CBD area. If your exact address isn’t on the list, you can contact the operator to try to arrange it.
You’ll be in a minibus that’s described as luxurious and temperature controlled. That matters in Auckland because weather can shift fast—one moment you’ll want a layer off, the next you’ll be glad you brought a jacket.
On-board basics are included: complimentary refreshments and water, plus high-speed internet. It’s a small detail, but it helps when you want to plan your next stop, upload a photo from Bastion Point, or simply avoid the phone battery panic.
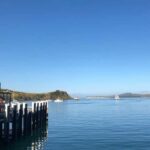
Harbor Bridge to Westhaven: Your First Big Look at Auckland
The tour starts in the CBD, then gets you to Auckland’s waterfront quickly. One of the early highlights is the Auckland Harbour Bridge viewpoint along the Curran Street waterfront, with Watchman Island in the photo mix. The stop is short, but it’s timed for easy viewing: you’ll have enough time to get your bearings and grab photos without feeling like you’re sprinting.
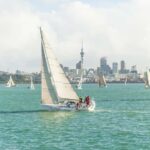
Next comes Westhaven Marina, described as the largest yacht marina in the Southern Hemisphere. Even if you’re not a sailor, marinas are great places to spot how Auckland sits so tightly around the water. The contrast between busy boats, calm stretches of harbor, and the city behind it makes for some surprisingly good photos.
If you’re a first-time visitor, these stops are a smart warm-up. They give you recognizable landmarks fast, so the rest of the day feels like it’s building on something you understand.
Kohimarama, Mission Bay, and Tamaki Drive: Beach Time Without the Setup
From the harbor side, you’ll travel through the coastal corridor via Kohimarama, Mission Bay, and Tamaki Drive. This stretch is where Auckland looks laid-back in a way that photos often miss—long sea views, casual beach energy, and plenty of places to stop and breathe for a moment.
The schedule is set so you may hit Mission Bay around lunchtime, which is useful if you want to grab a café meal on your own. Lunch isn’t included, so this is one of the better times to solve the food question without turning the day into a scramble.
On this part of the route, you’re also getting that “white sand beach” vibe—before you switch to the black sand intensity later. It’s a nice way to vary the coast rather than repeating the same scenery all day.
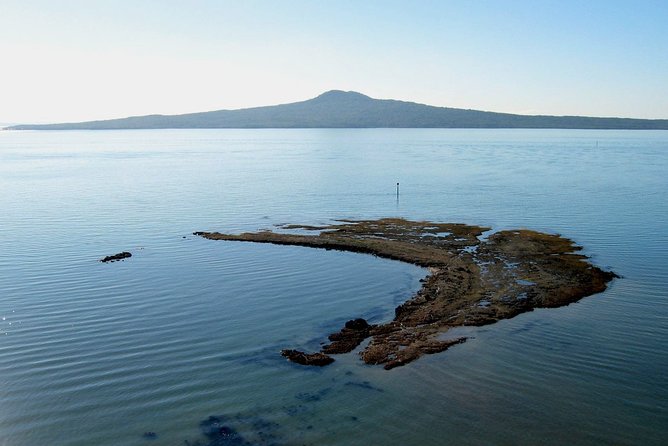
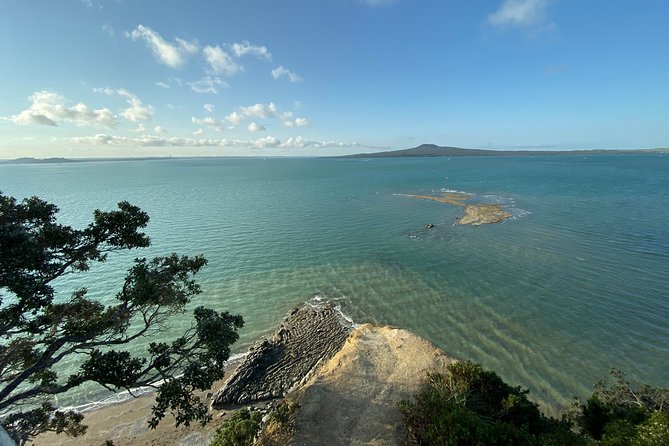
Bastion Point and Achilles Point: Skyline Photos with Real Stories
Now we get to the serious viewpoints. Bastion Point is built for harbor-and-skyline angles, with views out over the Hauraki Gulf and Waitematā Harbour, plus a look back toward central Auckland. If you like skyline photography, this is where you’ll feel the payoff: the city sits so close to the water that the horizon line is always in play.
Right after that, the tour heads to Achilles Point, a place that carries names from different eras. It was originally called Te Pane o Horoiwi, then renamed in 1940 to honor the New Zealand crewed ship HMS Achilles. Even if you don’t stop for the text, the meaning helps you look at the coast differently. You’re not just viewing a cliff line—you’re seeing a location tied to the region’s maritime identity.
If you’re traveling with a camera (or a phone that actually shoots well), these stops are your best bet for getting those “I’m in Auckland” shots that don’t look generic.
You can also read our reviews of more city tours in Auckland

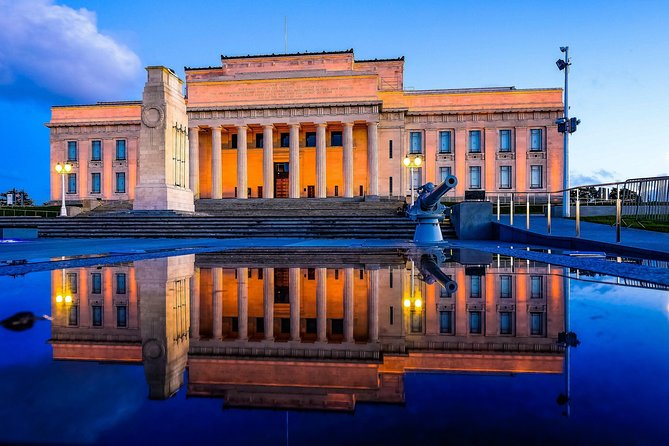
Auckland Domain and Its Quiet Detour
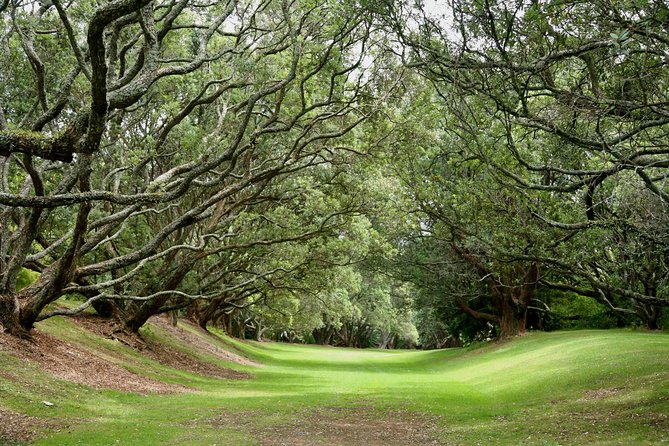
There’s also time through Auckland Domain, which is described as big and full of quiet places to sit and relax. You may also see a duck pond with a fountain, which sounds small, but it’s the kind of pleasant reset that keeps a day like this from feeling like nonstop sightseeing.
This portion works well if you’re the kind of traveler who values small breathing-room moments. Not every stop needs to be dramatic. Sometimes the best view is a calm break with a drink and time to reset your legs before the north shore crossing.
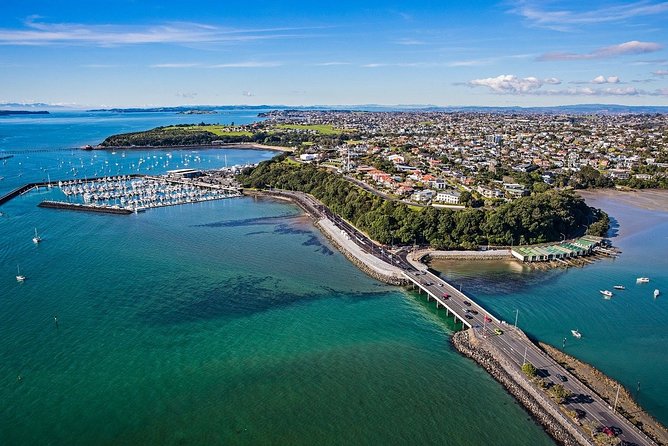
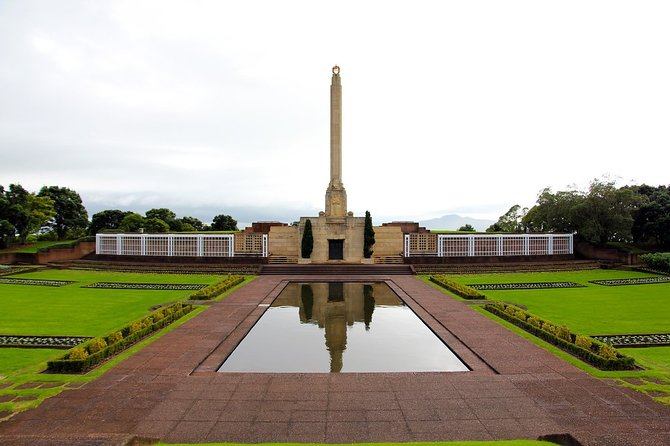
Devonport on the North Shore: 360-degree Views Back to the City

Crossing to the north side of the harbor is one of the best ways to understand Auckland’s layout. The tour heads to Devonport, taking you over the Auckland Harbour Bridge and then along the North Shore route.
At Devonport, you’ll get 360-degree views—city back in your sightlines, Hauraki Gulf out in the open, and a stronger sense of how the whole region is built around water. Even with a short stop, this is the kind of location that changes your mental map quickly.
Practical note: North Shore viewpoints can be breezy. If you’re sensitive to wind, keep that jacket layer ready.
Two Vineyards, Two Tastings: Westbrook Winery and Soljans Estate
The wine part isn’t an afterthought on this tour. You visit two vineyards, and the tastings are described as guided experiences.
First is Westbrook Winery for about 1 hour, with wine tasting included. You’ll also have the opportunity to purchase lunch at your own expense. If you want a more relaxed food plan, this is a convenient option because the day already offers a short “you can eat, or you can wait” window earlier.
Next is Soljans Estate Winery for around 30 minutes, also with a guided tasting included. The tasting is described with specific varietals, including Sauvignon Blanc and reds such as Merlot Cabernet, plus Pinot listed as part of the selection.
A key detail: you must be at least 18 years old and present a valid photo ID to consume alcohol. That’s worth remembering early in the day so you don’t get caught at the vineyard counter.
What you’re really buying here isn’t just wine. It’s a structured experience in New Zealand’s wine scene that fits into an 8-hour schedule—without you needing to drive between wineries or figure out tastings on your own.
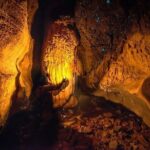
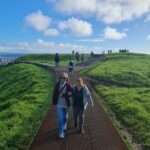
Muriwai Black Sand Beach and Gannets: A Wild-Coast Moment with a Twist
Finally, you reach the Muriwai Beach stop on the west coast. This is the “raw power” part of the day: rugged coastline, the drama of the Tasman Sea surf, and that unforgettable texture of black sand. The tour includes about 30 minutes to explore.
There’s also the Muriwai gannet colony piece. In general, the gannet nesting season runs from August/September until March/April, and a seasonal walk is described as available between September to April. But there’s a big real-world note: the gannet colony visit and the black sand beach are listed as suspended until further notice due to surface flooding and large slips.
So here’s how I’d handle it: show up ready to enjoy Muriwai for the beach and coastline even if the gannet walk doesn’t happen. If it does run on your day, it’ll feel like a bonus. If it doesn’t, you’ll still get the core experience of black sand and coastal viewpoints.
Dress for coastal time. Wear closed-toe footwear and bring a layer. Even when the sun is out, wind has a way of showing up at the worst moments.
Price and Value: Why $232.71 Can Make Sense
At $232.71 per person, this is not a budget “hop-on bus” day. You’re paying for a full day of transport plus guided stops plus wine.
Here’s what you get that pushes the value in a good direction:
- Pickup and drop-off in the Auckland CBD area, which saves you time and hassle
- A temperature-controlled minibus plus water and refreshments
- Photo-stop and viewpoint guidance across multiple key areas
- Wine tasting at two vineyards, both included
- Extra touches like high-speed internet on board
What’s not included: breakfast, lunch, dinner. That doesn’t kill the value, but it means you’ll want to plan your meals. Mission Bay around lunchtime can be a convenient place to find something, and you can also choose to buy lunch at Westbrook Winery if you’d rather handle food later.
If you’re traveling solo and don’t want to rent a car for just one day, the all-in structure can be a smart trade. If you already have a vehicle and you’re comfortable planning a self-drive itinerary, then the price is less of a slam dunk.
Who Should Book This (and Who Might Feel Frustrated)
This tour fits best if you’re:
- Visiting Auckland for the first time and want a big-picture day
- The kind of person who likes multiple viewpoints rather than one long hike
- A wine lover who wants guided tastings at two stops without extra driving
- Traveling with limited time and wanting pickup logistics handled
You might skip it if you:
- Need the gannet colony walk to be guaranteed on your schedule (it can be suspended)
- Want long, strenuous walking days (the walks are described as short and optional, with average fitness expected)
- Are determined to pack in personal detours and long stays at one beach—this schedule is structured, and you’ll be following it
One more small tip: the guides can make the difference between a “nice day” and a “great day.” I saw strong praise for guides named Karthik and Kat, with both described as friendly and able to give a lot of useful guidance along the route.
Should You Book This Auckland Coastal Experience?
If you want an easy, scenic Auckland day that mixes harbor icons, a serious west-coast beach moment, and two guided wine tastings, I’d say this is a strong pick. The structure is what you’re paying for: pickup, transport, photo-friendly stops, and two vineyards without you having to coordinate the whole thing.
Just go in knowing two things. First, you’ll handle meals yourself (breakfast and lunch/dinner are not included). Second, the Muriwai gannet walk may not run on your exact date due to current suspension—so enjoy Muriwai for the coastline even if the walk doesn’t happen.
FAQ
How long is the Auckland Coastal Experience tour?
It runs for about 8 hours.
What does the tour cost per person?
The price is $232.71 per person.
Do you get hotel pickup and drop-off?
Yes. There’s complimentary pickup and drop-off from the Auckland CBD area. The listed start point is Mövenpick Hotel Auckland, and the tour ends back at the meeting point.
Is this a small group?
Yes, it’s a small-group tour. The operator lists a maximum of 16 travelers for the experience.
What’s included in the tour price?
Sightseeing with a local English-speaking escort, return transfers, CBD pickup/drop-off, refreshments and water on board, temperature-controlled minibus transport, high-speed internet, photo stops, and wine tasting at two vineyards.
How does the wine tasting work?
Wine tasting is included at two vineyards (Westbrook Winery and Soljans Estate Winery). To consume alcohol, you must be at least 18 and have a valid photo ID.
Will I see the Muriwai gannets?
A gannet colony walk is seasonal and described as available between September to April, but the visit is also listed as suspended until further notice due to damage from flooding and slips. It’s not guaranteed.
What should I wear or bring?
Wear comfortable clothing and walking footwear, and bring sun protection and a jacket/warm layer. Closed-toe footwear is recommended, and a camera or phone with camera capability is ideal.
What happens if the weather is poor?
The experience requires good weather. If it’s canceled due to poor weather, you’ll be offered a different date or a full refund.